What is UV Mapping and Unwrapping?
This week I was tasked with UV mapping an object and then unwrapping that object so firstly, I will be discussing what these mean so UV mapping is where there will be a flat representation of the 3D model I have made and with this, it will allow me to apply textures to any model that I have created, and UV unwrapping is the process of making a UV map.
A way to think of a UV map is that it’s similar to making an object like a cube by using a net on paper and all of the textures that are on a 3D model are made up of 2D images and when you unwrap your object it’s the deconstruction of the object down to a net so you can apply colour and texture information to the object.
The Process of Making a UV Map in Maya and Unwrapping an object

Firstly, you will need a model to which you want to create a UV map and apply a texture to and in this case, I will be using a cube as I will be making this cube look like a cardboard box when applying a texture to it.
Creating a Material and applying a Texture to an object
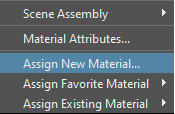
The next thing I need to do is assign a material to the object as this will allow me to apply the texture that I want to to do this you need to hold down the right mouse button to bring up the radial menu and there will be an option to assign a new material to an object and in the image below you can see what this option looks like.
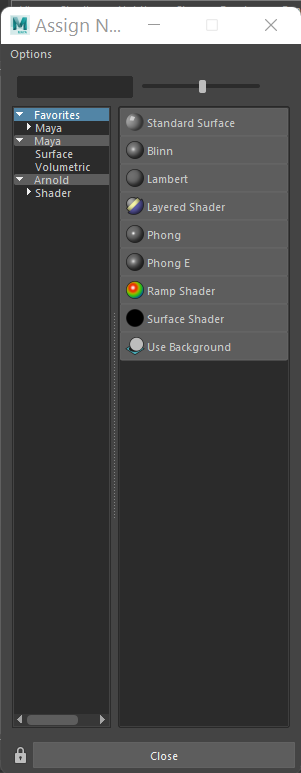
When you select this option, it will open a new window that allows you to select the type of material that you want to apply to your object and in this case, I will be using the lambert material for this object.
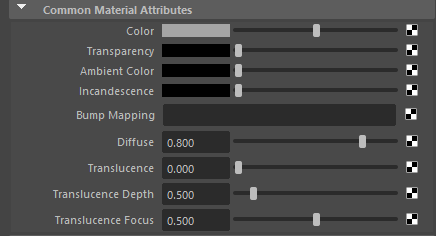
When you select the material that you want to use it will now show up in the attributes editor and this will allow us to edit the attributes of the material and the attribute, I am interested in changing is the colour attribute as this will allow me to use a file as a colour which will be the texture I am going to use and to get this option to show up you need to click on the black and white checker pattern that is next to the colour option and from there, a new window will appear with many different options and from there you will able to select the file option.
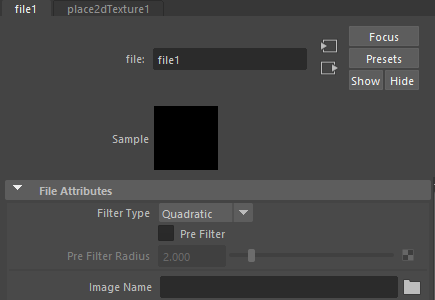
When you select the file option from this menu a new window will appear in the attributes editor and from here you are able to pick the file that you would want to use as a texture and to pick the file that you want to use you click on the folder icon next to the image name option and this will allow you to browse your computer for a file that you want to use for texture.
UV Editor
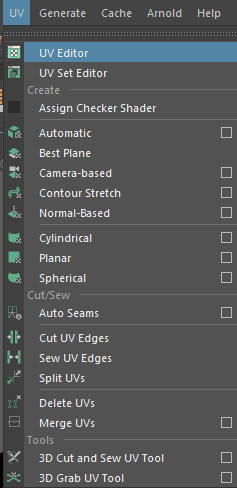
Now the texture will be applied to your object however when you import your texture it won’t be applied correctly to the object as you can see in the image below to fix this, we will need to open the UV Editor and to do that you select the UV option that is right at the top of the UI and from there you will be able to open the UV Editor.

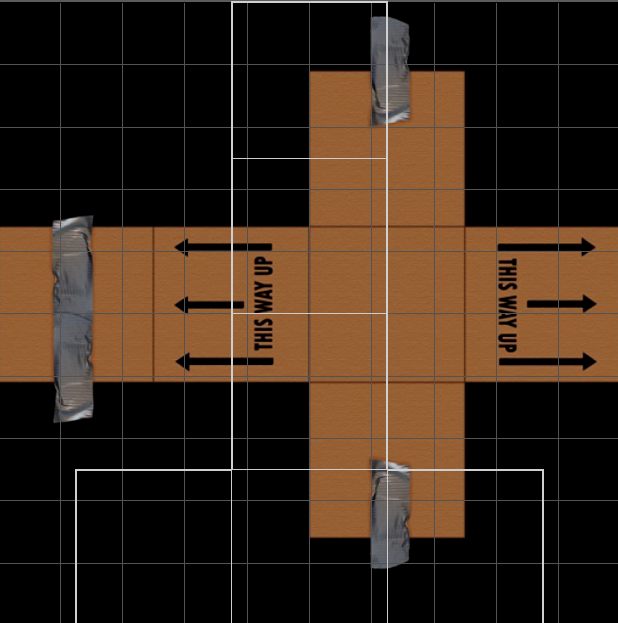
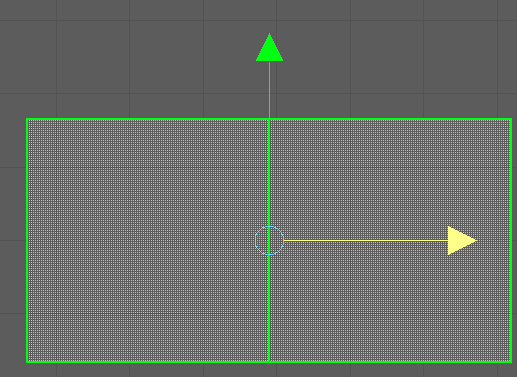
When you open the UV Editor it will be blank and to make your object appear in the UV editor you have to select the object from the scene view and it will look something like this as you can see the textures aren’t aligned with the square outlines which are the UV shell and matching the UV shell where the textures are will make the textures appear in the correct places.
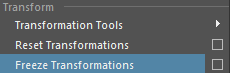
However, before I can do that, I need to freeze the transformations of the object and the reason we do this is that when I go to use the automatic UV map option if I do this without freezing the transformations on the object it will cause it to stretch and it won’t look the way it should. Also, to freeze the transformations of any object in Maya you need to select the modify option that is on the top of the user interface and there will be an option to freeze the transformations.
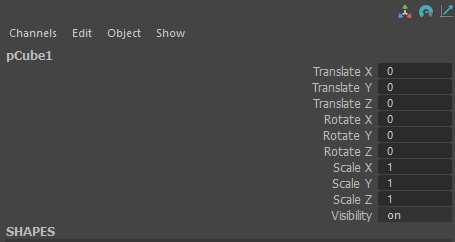
Also if you look in the channel box of the object you have to freeze the transformations on you will see that all of the options have to be set back to zero and one however this won’t change the size of the object to those sizes they will stay to the size that you set them to earlier and now when I go to use the automatic UV map it won’t stretch parts of the UV due to them being set back to their original size.
When you click on the automatic UV map option when you look in the UV editor you will notice that the UV shell has split into different pieces this will allow me to make the UV shell match the shape of the textures and by doing this the textures will appear where they should. Also, to use the automatic UV option you could to the UV section of the UI and select the automatic option.
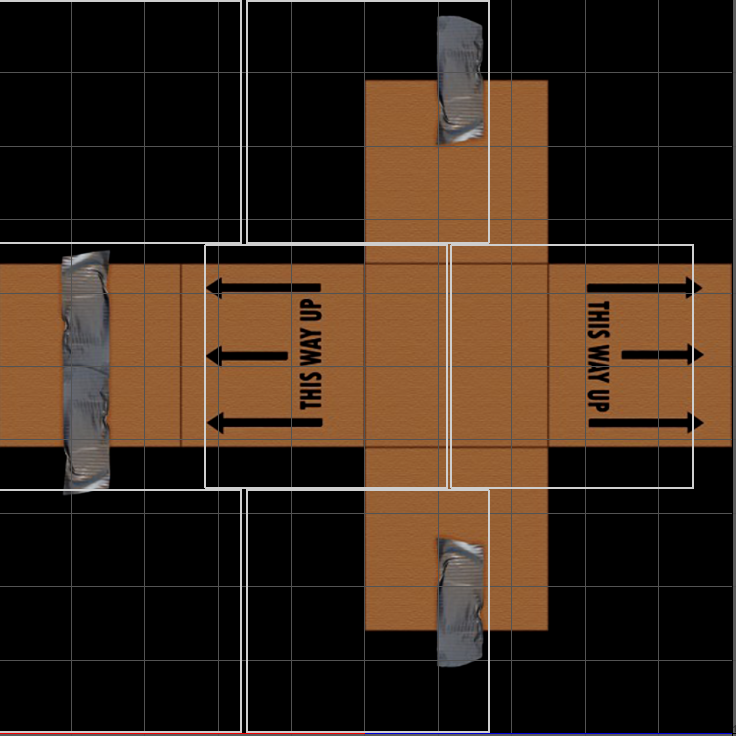
To make the UV shell match the shape of the textures I will need to stitch them together to make the cross shape and to do this I will need to use the edge tool in the UV editor and the cut and sew tool to stitch them together. And to do this I will select one of the edges on the UV shell and in this case, I will select the bottom one and go to the cut and sew menu in the UV editor and select the stitch together and now you will see that the one part of the UV shell has attached to another one and I will keep on doing this until I get the shape that I need.
Now that the UV shell is the same shape as the textures I can start to position them where they need to go however you will notice that the UV shell is larger than the textures and to fix this I will just scale down the UV shell to match the size of the textures.
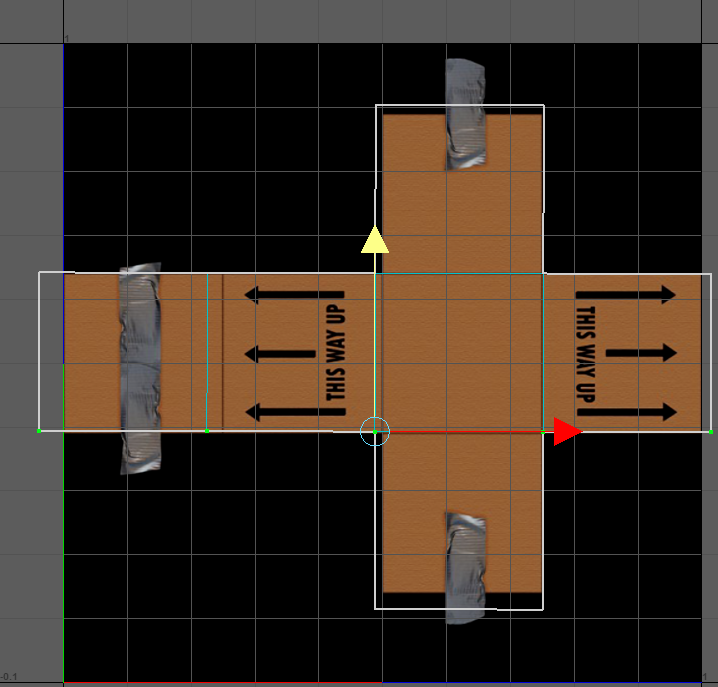
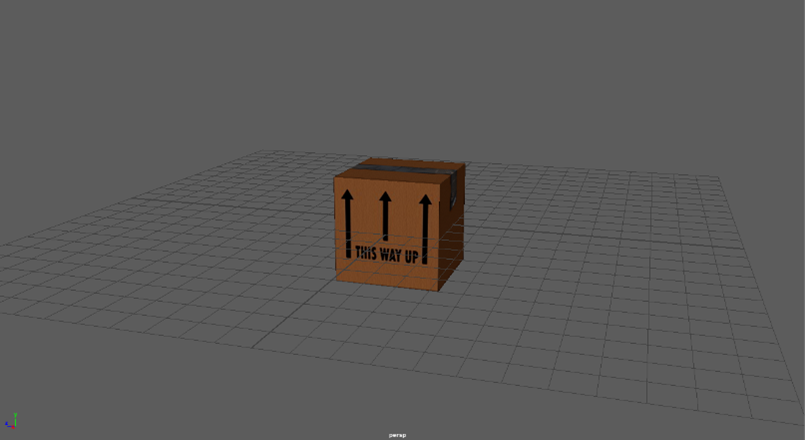
However, when I scale the UV shell and move it into the correct position parts of the UV shell will overlap and fix this all I need to do is hold down the right mouse button to bring up the radial menu and select the UV option this will allow me to select the parts of the UV shell that I want to change and this will allow me to fix the overlapping issues as you can see in the image below and I will keep on doing this until the shape matches the textures perfectly. Now we are finished with UV mapping, and you can see what the final result looks like below.