Unreal Material Exploration
Creating a Material
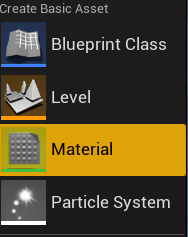
Now, I am going to discuss the process of making materials in Unreal and materials affect the look of the object when a material is placed on it so you can use a material to make an object in your scene look the way that you want it to. So firstly, to create a material you must right-click in the content browser then a drop-down menu will appear with many options and in this case to create a material you click on the material option and now a blank material will appear in the content browser, and you can name it anything also below you can see what this drop-down menu looks like.
Material Editor/Material Nodes
Now, to change the look of any material in Unreal you need to go to the material editor and to access it you have to double click on the material that you have created then a new window will open which will allow you to edit the values of each node in the material editor and depending on how you change the value of a node it will change the appearance of the material.
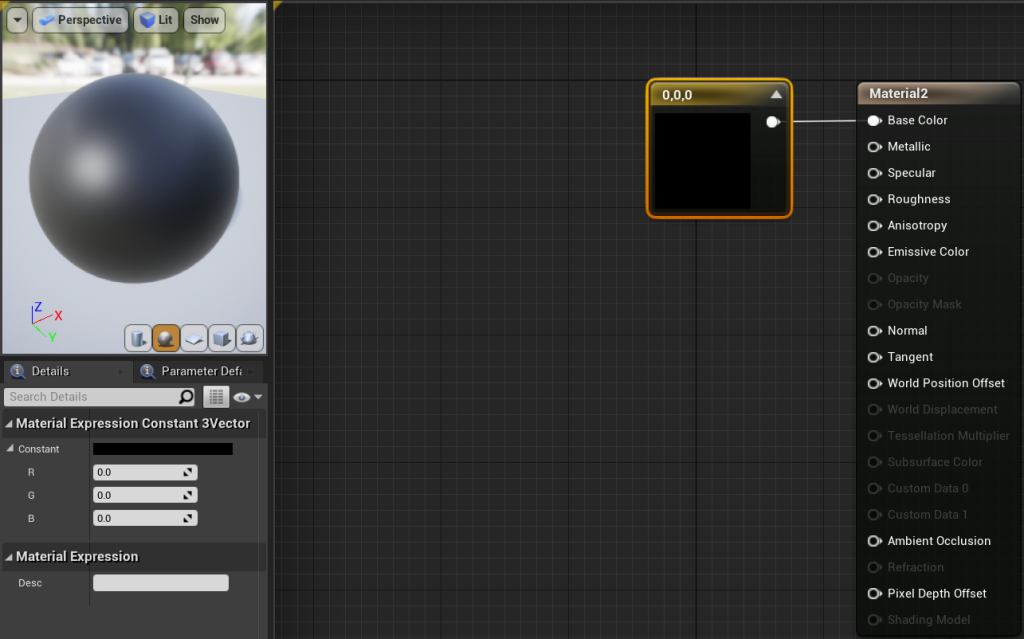
Next, I am going to look at each node does and how changing the value of each affects the look of the material itself so firstly I am going to look at the base colour node and what this node does is that it allows you to change the colour of the material that you are currently editing and to change the colour of the material to what I want it to be I need to link a constant vector 3 node to the base colour node and the reason I am going to use a constant vector 3 node as it gives me access to the full RGB values and by linking it the base colour node to it will allow me to change the colour by changing the RGB values.
Also, to create a constant vector 3 node all you need to do is hold down the left mouse button and press the 3 on your keyboard then just link it to the base colour node then you will be able to change the colour of your material and in the image below you can see what this looks like.
Metallic Node
Now I am going to look at the metallic node and what this node does is that it changes how reflective the material is and by using this node it makes the material look like how metal looks when light is reflecting on it, so it gives the material a shiny look to it and to make the material look metallic you have to link a constant vector 1 node and to link it to the metallic node in the material editor and the reason I am using a constant vector 1 node here is that I only need to change the value of the how metallic the object is.
As the other vector nodes give you access to other values that I don’t need to change such as the RGB values and to make a vector 1 node all you need do is hold down the left mouse button and press 1 key on the keyboard then link it to the metallic node also in the image below you can see what this looks like.

Specular Node
Next, I am going to look at the specular node and this node changes how bright the specular reflections are on the material to change the value of this node you need to link a constant vector 1 node to the specular node to change the value of it and this will change how bright the specular reflections are also in the image below you can see what this looks like.

Roughness Node
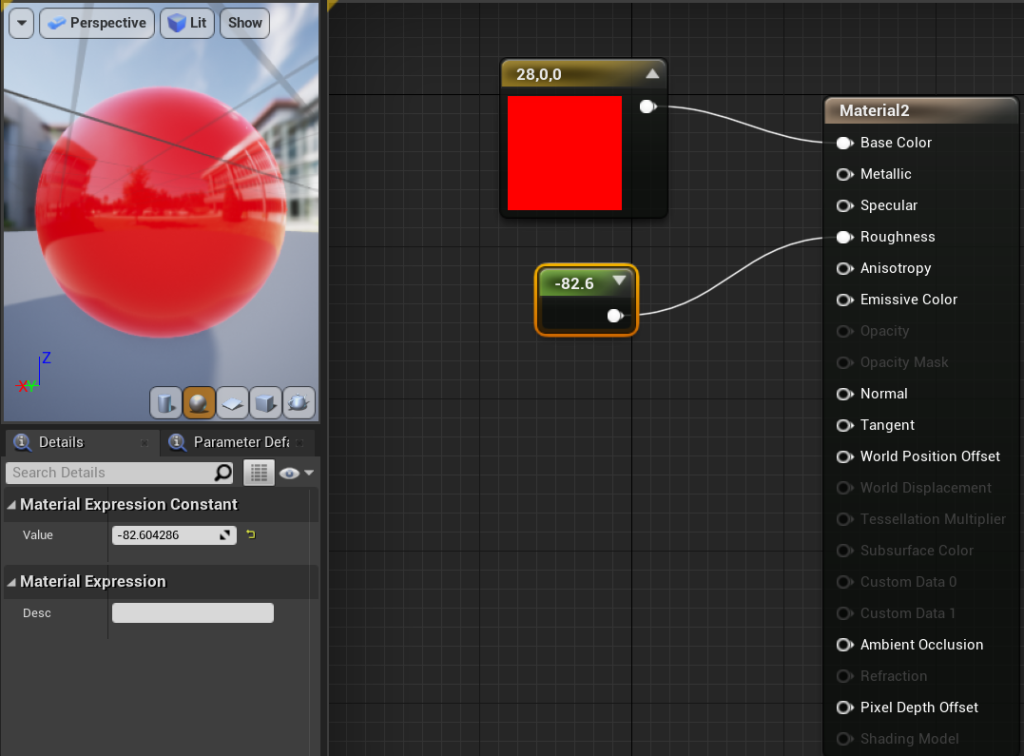
The roughness node changes how rough or smooth the surface of the material will be so depending on how you change the value of this node the material will look more smooth or more rough-looking and to change this value again you need to link a constant vector 1 node to the roughness node and as you see in the image below due to decreasing the value of the roughness node it has made the material look more smooth and made it very reflective and if I increased this it would be less reflective.
Emissive Colour Node
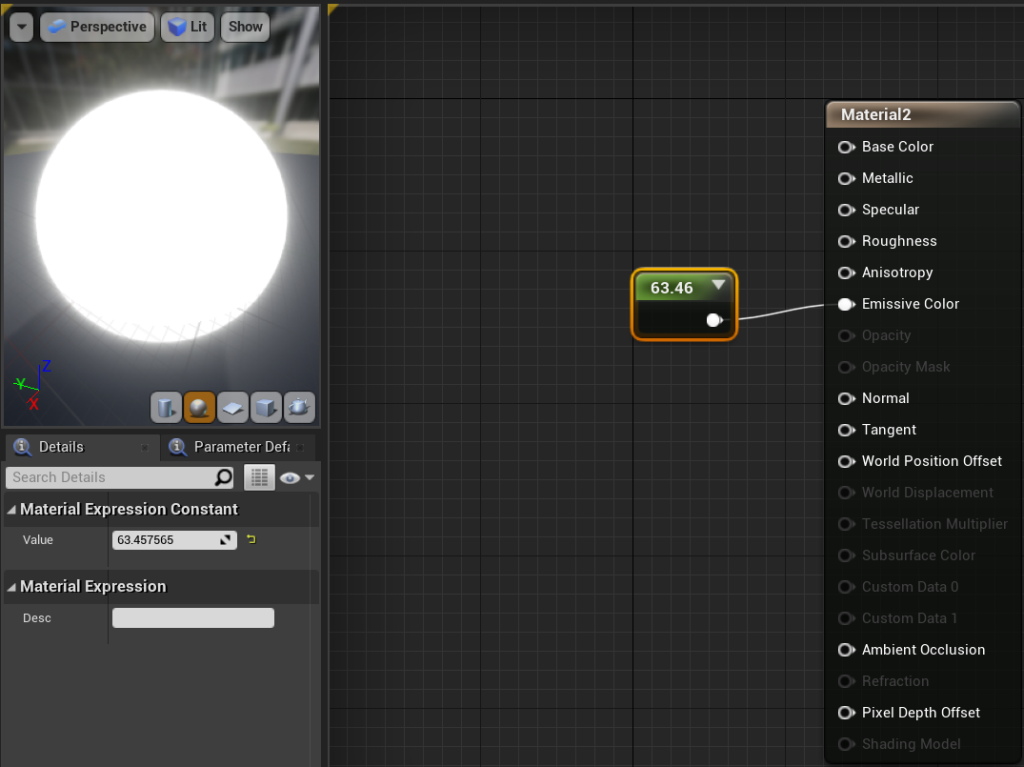
This will be the last node I am going to look at so the emissive colour node gives the material a glowing effect to it so if wanting something like a neon light I could use this node to achieve that and to edit the value of the node again you need to use a constant vector 1 node and link it to the emissive colour node and see what the glow effect looks like in the image below.
Applying a Material to an Object
Now the last thing I am going to discuss relating materials is how to apply a material to an object that you have created so firstly you need to place an object into your scene and in this case, I will be using a cube for this example then you have select that object and go to the details window and scroll down in there until you find the material section in the details window from there it will allow you to select any material that you have created and you can see what this window looks like in the image below.
