Making A Mug In Maya
Now, that I finished going over the basics of Maya I am now ready to create something using Maya to start off I am going to create a Mug the reason I chose to create a Mug is that it will be simple to create as this is my first time creating something in Maya and by creating something simple to create it will allow me to get more of an understanding of how Maya works then, later on, I can take what I learnt from creating this to make something more complex.
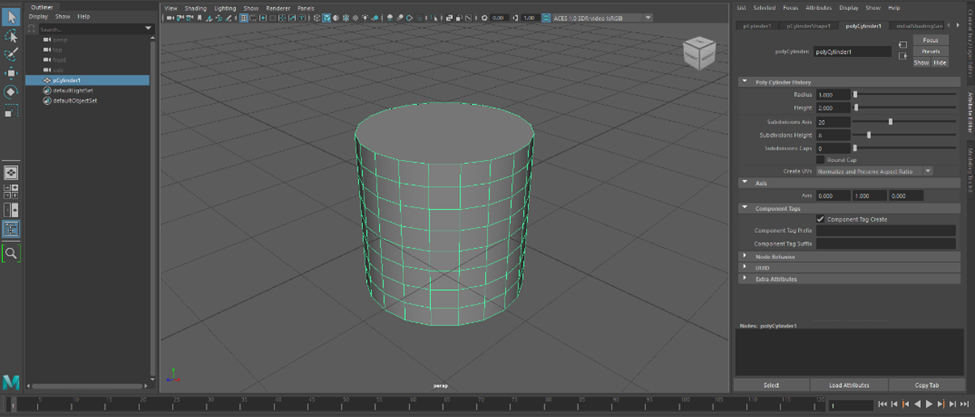
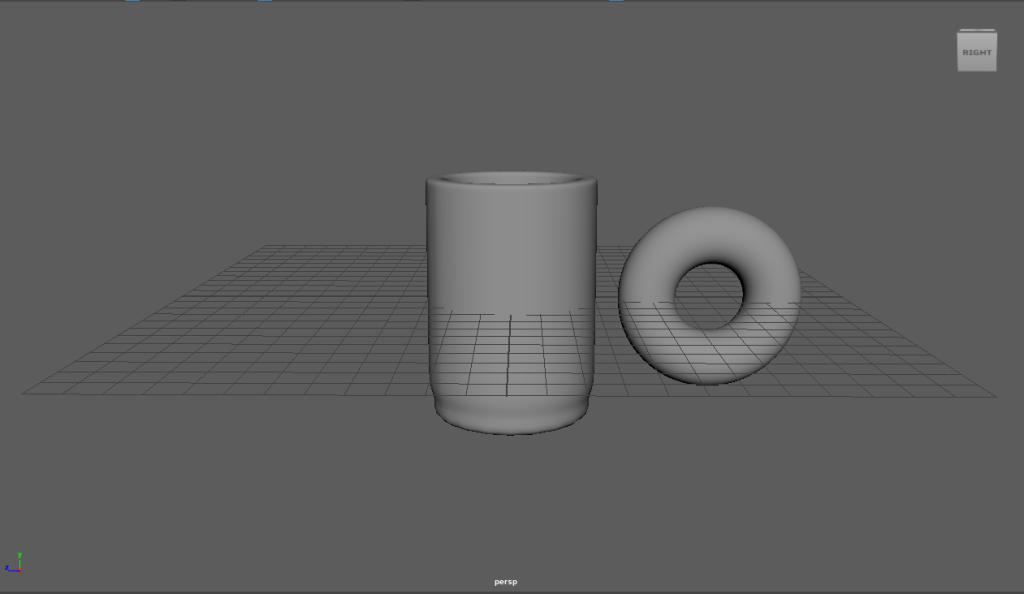
Now with that out of the way, I am going to walk through each step I did to end up with the final version of the Mug that I created. The first thing I am doing to do is place a cylinder shape onto my scene as most mugs tend to be shaped like a cylinder then I am going to need to adjust some of the settings of the cylinder I have created and this can be done in the attributes menu and the settings I am going to change are the subdivision height of the cylinder and what this means is that it will increase the amount of the green boxes that appear on the mesh/surface on that object and the reason you might want to increase this option because it will allow you to finely tune specific parts of the mesh/surface on the object you are making without making changes to the whole object.
Since I am going to be increasing the height of the subdivisions this will affect it on the Y coordinate since Y represents the height in a 3D space this will only change the subdivisions that are on the Y coordinate, and I will be increasing the subdivisions by 8. Also, the last change I am going to make to the cylinder, for now, it removes any subdivisions from the top and the bottom and this can be done by setting the subdivisions caps to zero the reason I would want no caps is because this will allow me to edit the whole top or bottom and those changes will affect the whole of the top or the bottom parts of this cylinder, for example, later on, I will need to delete the top part of the cylinder since this is going to be a mug and like a real mug you need a place where you will able to place liquid into it and being drink from it.
Smooth Mode
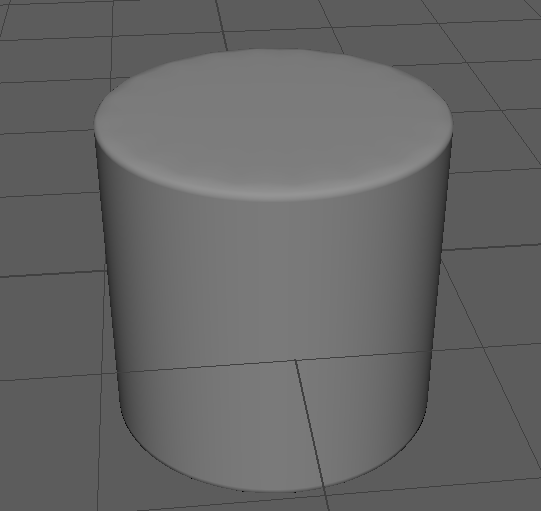
Before I go onto the next step of how I am going to make my mug I am going to discuss smooth mode and what this does it will allow you to preview what your object will look like when you finally render it and as the name implies it will smooth your object out and to use this mode you have 3 on your keyboard and press 1 to go back to how it looked before. The reason you would want to use this mode is that before you try to render the final version of your model it will give you a preview of what it would look when rendered so if you didn’t like the way it looked in this preview you would able to make changes to your object instead of realizing when you rendered your model you don’t like the way it turned out this mode is a big time saver because being to preview what it looks like when it’s rendered and when making creating my mug in Maya I used this mode multiple times to get a good idea what the final version would look like.
Now, with that out of the way, I am going to continue making my Mug so now I am going to add two edge loops to the top and the bottom of my cylinder the reason I am adding two edge loops is that it will make the top and bottom not curve in as much as it did before, and we can see this change when going to the smooth mode preview as you can see in the images below.
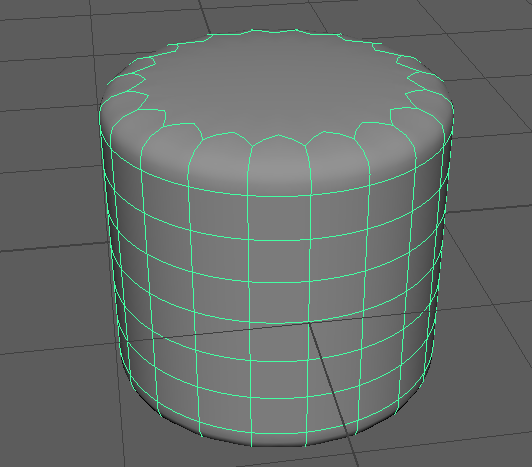
To use the edge loop tool you have to the mesh tools menu then select the insert edge loop option as I want to put my edge loops at the top and the bottom I need to position them near there and to do this you have to click-drag near the top or the bottom and then a line will appear which to move around to your liking as you see in the image below and when your happy with where you placed your edge loop you can deselect your object and switch back to object mode by bringing up the radial menu as mentioned earlier then previewing how the edge loop turned out in smooth mode.
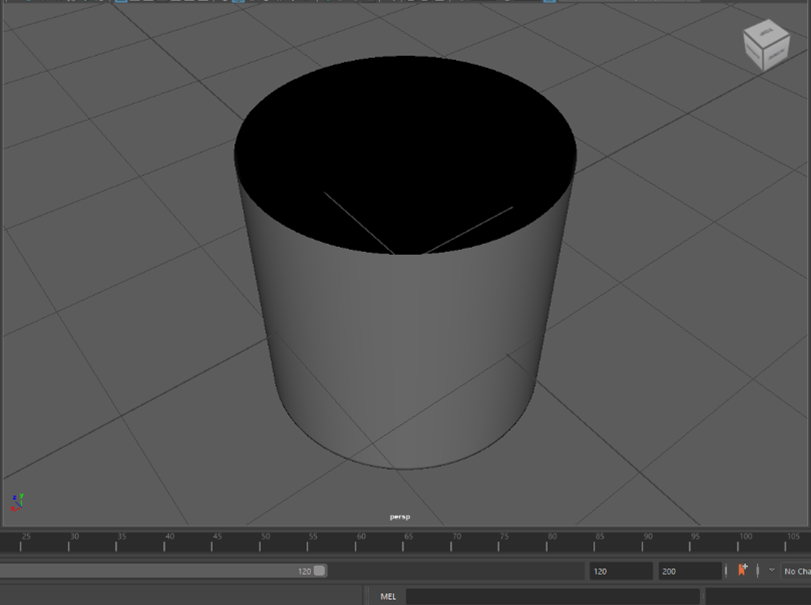
Now I am going to need to delete the top of the cylinder and the easiest way to do this is by switching the top perspective of the cylinder then selecting the cylinder and holding the right mouse button to bring up the radial menu and selecting the faces option as this will allows me to select each faces on the object and in this case I would to select the top of it then press the delete key.
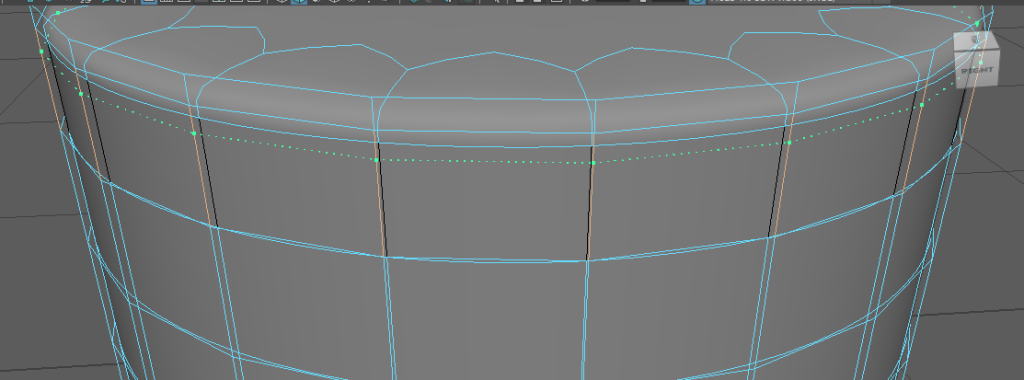
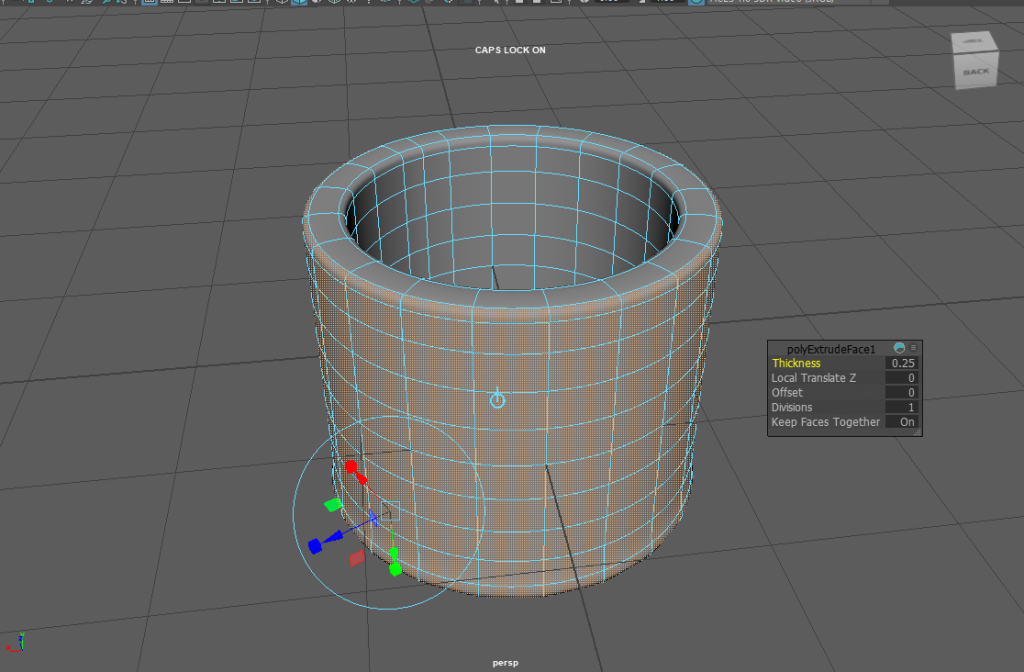
Now, I am going to extrude the cylinder and the reason I am going to do this is to make the cylinder thicker in size basically this will increase the size of the cylinder and to use the extrude tool you have to look at the top menu where all of the icons are select the extrude icon which can see in the image below or you can press the control key and the e key on your keyboard to extrude any object that you have selected when you select the extrude tool the object you have selected will change colour and next to the object there will be a window allowing you to change some settings and in this case I want to change the thickness of the cylinder to 0.25 when I press enter on my keyboard it will change the thickness of the cylinder.

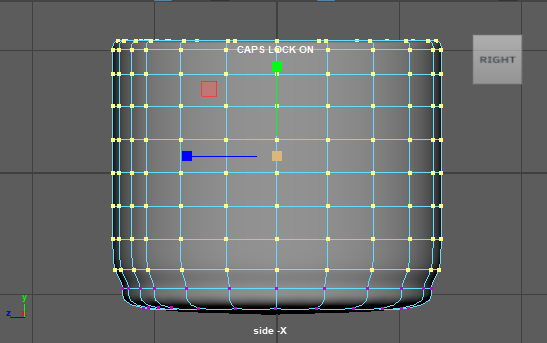
Next, I am going to go into the side perspective of my cylinder then I am going to bring up the radial menu then select the vertex option now with this mode selected I am going to press the left mouse button and drag it over the top vertices of the cylinder then I am going to select the scale tool which can be found left side of the user inference you can see what the icon for this tool looks like in the image below. Now that I have the scale tool selected, I am going to scale it out by little bit and the reason I am scaling it out is that it will make the bottom of the cylinder appear more curved than it was before.

Increasing the Length of the Mug
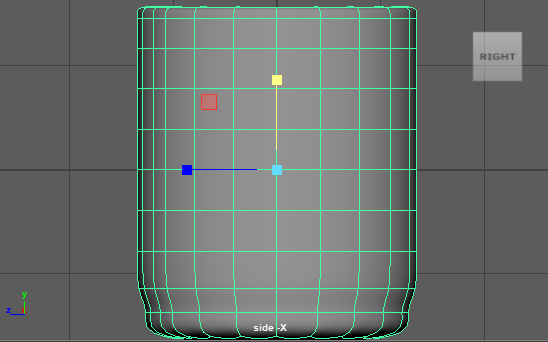
Now, I am going to increase the length of the mug to make it appear taller because mugs tend to be a bit taller in size than the mug that I have currently made and to do this I am going to have to use the scale tool again to increase the length of the mug also I am going to switch to the side view of the mug to help me increase the length of the mug because from this perspective it will give me a better idea of much I have increased the length by.
Making the Handle
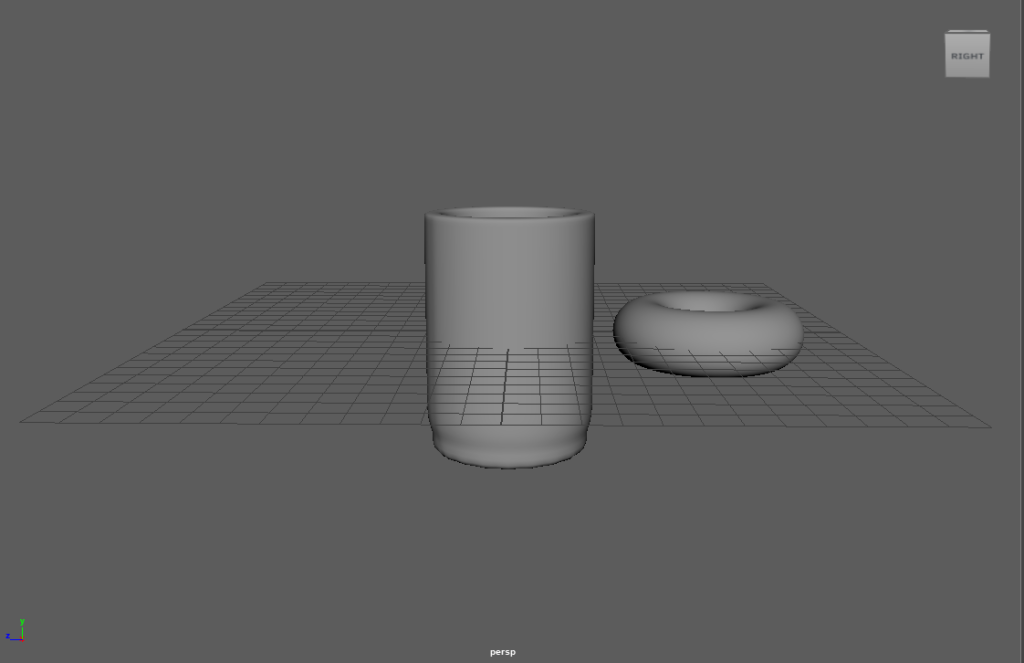
Next, I am going to need to add a torus to my scene because I will be using this shape as the basis for the handle that I will be attaching to my cylinder to make it a mug so to place a torus into my scene I need to go to the primitive’s menu then select the icon that has torus on it when it is first placed into the scene it will appear inside of the cylinder.
To fix this I have to select the move tool and just move outside of the cylinder then I am going to scale the torus up in size to be closer to the size of the mug and the last thing I am going to do to the torus, for now, is to set the subdivisions height to be the same as the ones I set on the cylinder so to match the cylinder I will be setting the subdivision height to 8 and the reason I am setting it to the same subdivision height is that I need to be able to line up the two shapes to make them into one shape.
Rotating the Torus
Now, I must rotate the torus as of right now it is currently facing down, and I need it to be facing upright because that will allow me to connect it to the cylinder and then it looks like a handle for the mug that I have created. So, to rotate the torus I will use the rotate tool when this tool is selected in the channel box there will be controls for the rotation of that object and on the rotate x option, I am going to set it to -90 so this will rotate the object by 90 degrees on the x-axis and you can see what that looks like in the image below.
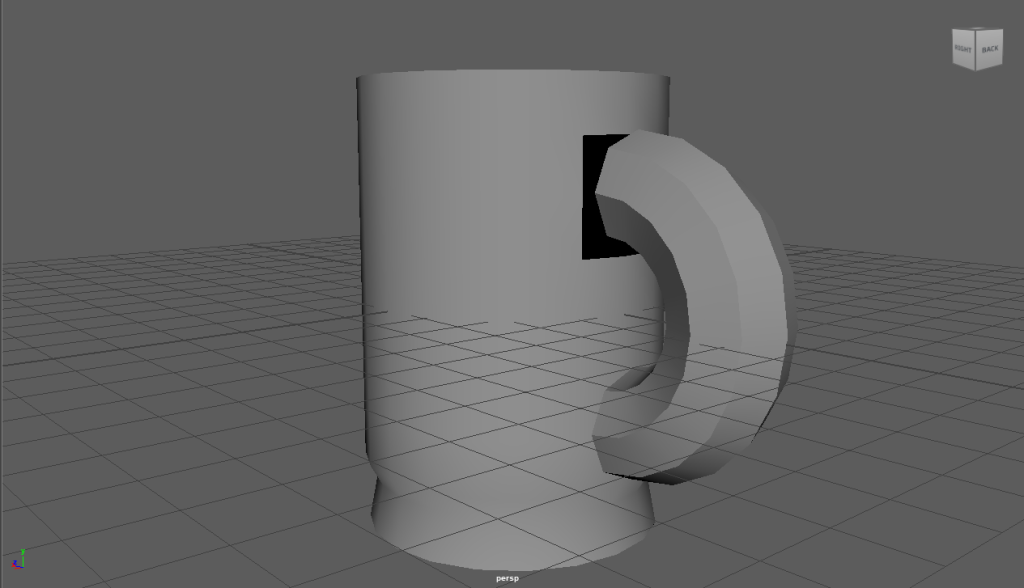
Also, after I have done that I need to cut the torus in half however I could keep the whole torus and just put the other half inside the cylinder the reason I am not going with that method is that if this object was put into a game and you were able to see inside the mug you would be able to see the other half of the torus and in general it would look unprofessional and unpolished so instead I am going to cut it in half and then attach it to my cylinder.
To cut the torus in half I need to bring up the radial menu when selecting it by holding down the right mouse button and then selecting the faces option then I am going to select the half I need to delete by dragging on it then just press the delete key on my keyboard to delete it.
Attaching the Handle to the Mug
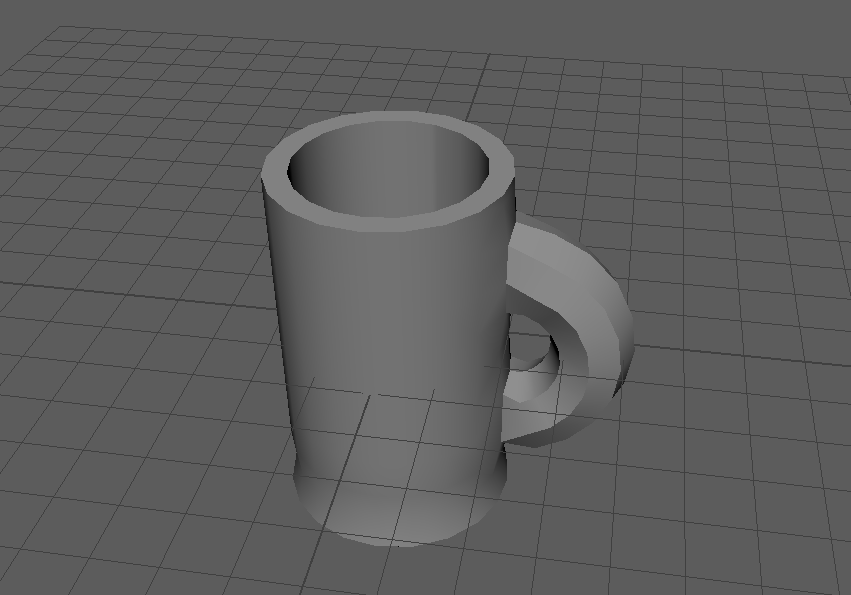
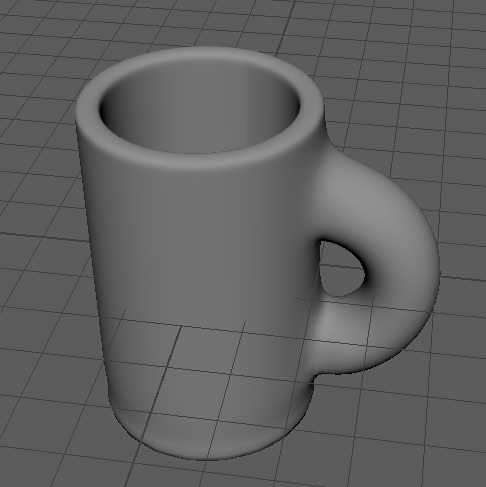
Now I am finally on the last step of how I created my mug and to attach my handle to my cylinder I could simply just drag the handle into the cylinder to look it’s connected however I want to combine these two shapes to make one complete object, and this can be done by that first I need to delete parts of the mesh on where the handle will go as seen in the image below then when I connect the two shapes together it will fill in this space.
Before I can connect the handle to the cylinder, I need to combine the two objects together and to do this I will go to the outliner and then I can shift-click on both shapes then I will go to the top of the user inference and select on the mesh tab then from there will click on the option that says combine and this will combine the shapes together.

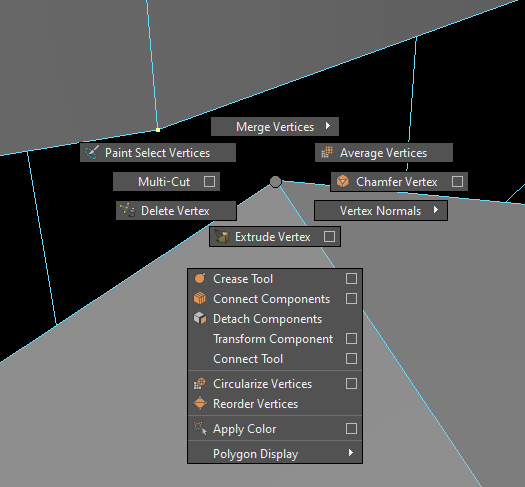
Now with that out of the way I can start connecting the handle to the cylinder and to do this I have to bring up the radial menu and then select the vertex option what this option will do is allow me to connect the vertices of both shapes together and to combine them together all I have to is press the shift key on one of the vertices from the handle and one from the main cylinder if I keep on holding down the shift button and click the right mouse button a new menu will appear which allow me to merge the two vertices together and by clicking on that option and another option will appear which will allow you to merge two vertices to the centre and I have to do this for the rest of the handle and then both of the shapes will be merged together.