Photo Manipulation In Photoshop
What is Photo Manipulation?
Photo Manipulation is where you take an existing image or photograph and edit that image to your liking like for example if I wanted to change the background of an existing image, I could do that by editing that image in Photoshop and so on anything you want to change about an image can be done by editing it to make it a completely different image.
The Process of Image Editing in Photoshop
The process of changing an image will be very different depending on what you want to change in the image you are trying to edit but they all follow a basic structure as before you start changing the image that you chose. First, you need to import the image or images that you want to edit into Photoshop and to do this all you need to do is to press the open button when you first open up Photoshop and this will allow you to select the files that you want to edit.
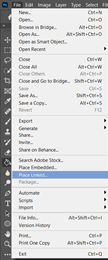
Also, later on, you might want to add more images to your existing photoshop document as you might want to combine them to make one image when you edit them and to add a new image to canvas you can do this by clicking on the file button and then selecting place embedded or linked this will allow you select any more images that you might want to import into your existing document and you can see what these options look like below.
Using the Colour Lookup Tool
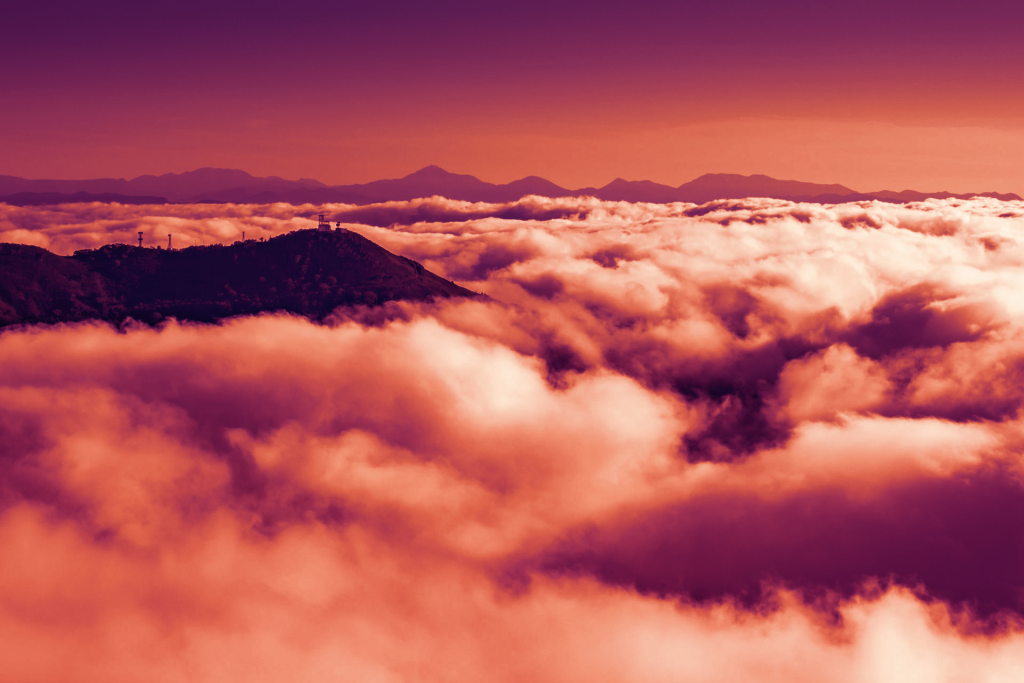
Now with the initial setup out of the way, I am now going to discuss the type of photo manipulation that I did in Photoshop and what I did was that I change the lighting of the image to make it look like it was taken during a different time during the day and the reason I chose to do this is that that when making assets for a game project you might want to use the same asset that you created again like for example if I had made a background for a game project and wanted the time of day to change like during a level I could use this type of image editing to achieve that effect without having to completely recreate my existing asset.
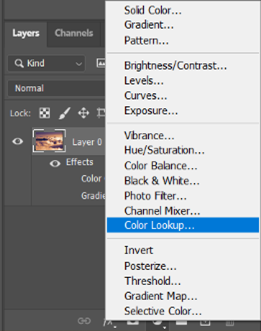
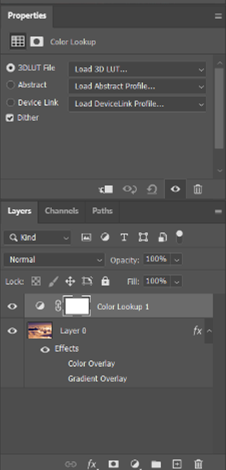
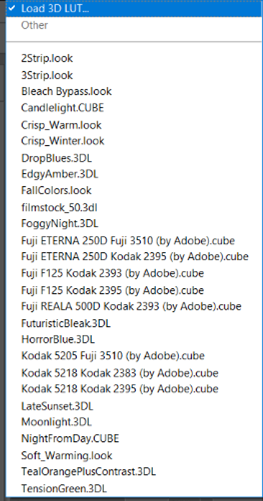
Now I am going to show which tool I used to create this effect. The tool I used was called colour lookup and what this tool does that it will take your image and apply that colour to your image based on what option you selected in the colour lookup. How, you use this tool is by that you go to the bottom of where your layers are and select create new or fill adjustment layers option and this option is the one with the circle icon so by selecting this option it will give a couple of options and the one I chose was the colour lookup option. Now, this will now open a new properties window on the right of the screen and to use the different options that Photoshop has you select the first option and scroll down until you find an option that you would like to use in your image also you can see what these options look like below.