Experimenting With Landscapes (Week 2)
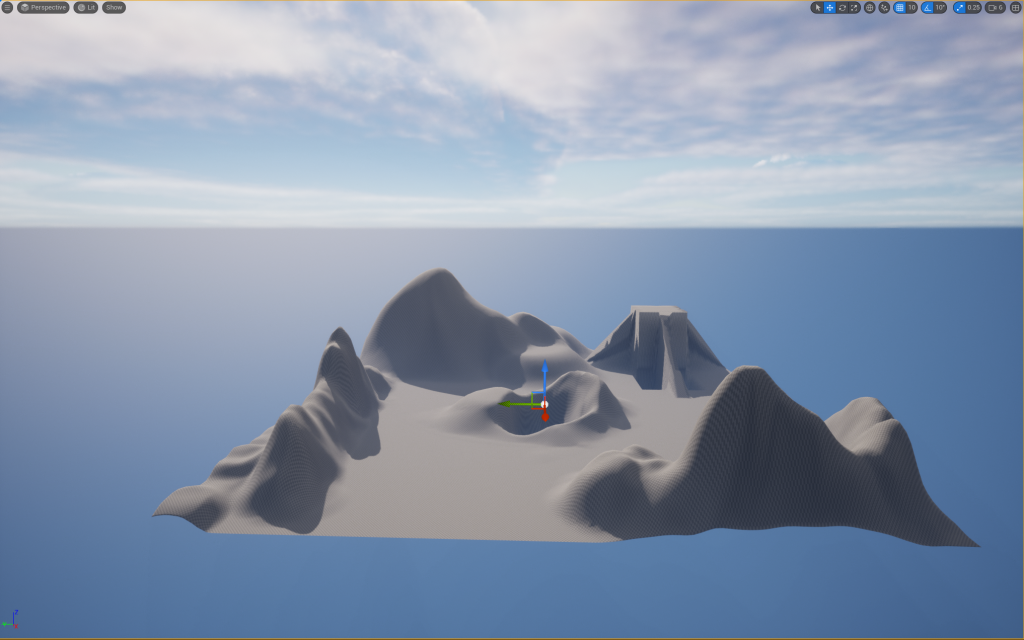
I was tasked with experimenting and creating various landscapes using Unreal Engine. I am going to show the process of how I created these landscapes, such as creating mountains and how I adjusted the height of everything that I created in Unreal in the image down below, you can see the landscape that I have created I am going to show you how I ended up with this.
Creating A New Level for My Landscape
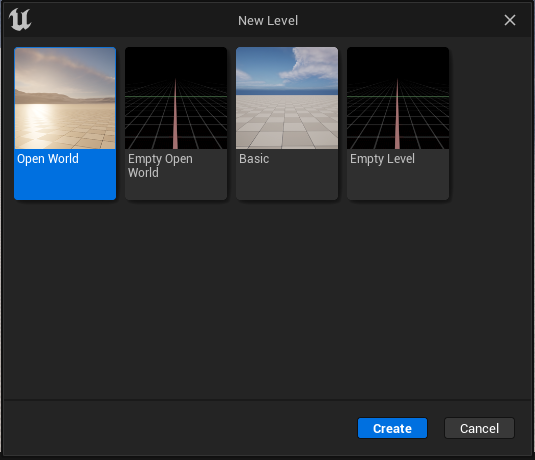
Firstly, I created a new project In Unreal for the landscape I chose to use the third-person template with all of the starter content, and I needed to create a new level since this template has a level by default and I want a blank level where I can create my landscape so to do this you can navigate the top of the UI to the file tab and click on the create a new level button or press ctrl and n on your keyboard.
This will open a new window on your screen asking you what type of level you want to create, and in this case, I will be picking the basic level option, which just has basic lighting already set up for us, and this is where I will start to create my landscape.
Using Landscape Mode and the tools within it
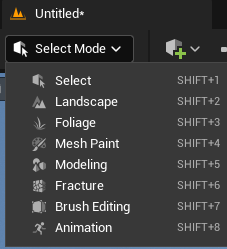
Now that I have created a blank level, the first thing you will see is a blank floor. However, I won’t be using this for making my landscape, so I am just going to delete it now I am going to switch to landscape mode and to do this on the top of the UI, you will see a button that says select mode which is the default mode and switch modes just click on the button and a drop-down menu will appear with all the different types of modes that Unreal has and of course in this case I will be selecting the landscape mode option.

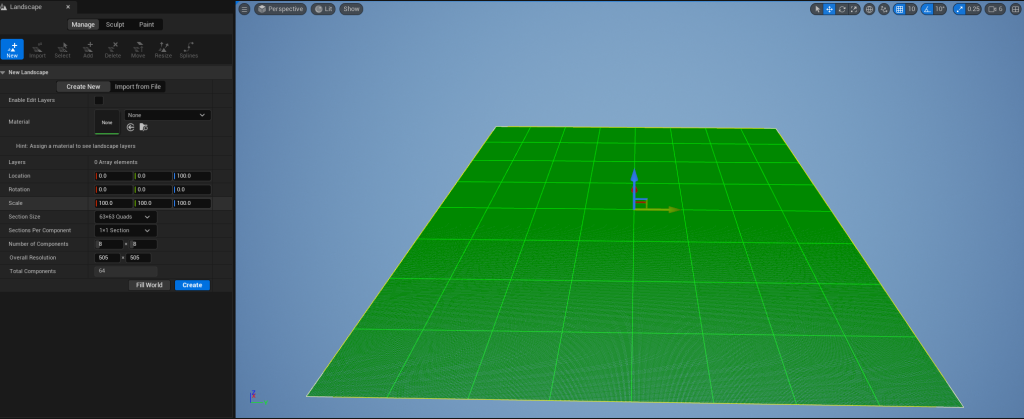
When you select this mode, a green grid appears over your level, and this shows the size of the landscape that we can work on; you can increase the size of the landscape to any size that you want if you want to create a big landscape you can and to do this on the left-hand side of the UI you will notice some options that you can regarding your landscape and the ones we want to use to change the size is changing the number of components the landscape is made of, and this will change the overall size of the landscape on the x and y axis, however, for now, I will be using the default component size which is 8 by 8 on each axis.
List of the Landscape Mode Tools
Sculpt Tool- This tool allows you, as the name suggests, to sculpt the surrounding landscape, and this tool is mainly used to adjust the height of a landscape as this tool, you can increase or decrease the size of the landscape you have created and to raise the landscape you press ctrl and the left mouse button to raise the area that you have selected and to decrease you press ctrl shift and the left mouse button to decrease the area you have selected you would use this tool if you wanted to create a hole or generally lower the size of the whole area.
Smooth Tool- This tool allows you to smooth any area that you have selected so if an area looks very ruff in appearance, you can just go over it and make the area smoother if that’s the look you are going for that area.
Flatten Tool- As the name suggests, this tool will flatten any area that you have selected when using this tool, no matter how high up or low is it that part of the landscape will still get flattened by this tool.
Ramp Tool- This tool allows you to create a ramp between two points that you have selected, and this tool works differently from the rest since it doesn’t act like a brush like most of the tools do in landscape mode; how this tool works is that you select one point where you want the ramp to start and another point where the ramp will end, and it will create ramp where these points were.
Erosion Tool- This tool simulates how erosion would affect an area in your landscape by adjusting the height of the landscape in the area that has been selected. It does this by simulating the transfer of the soil from a high up to a lower area and how it would occur naturally basically, the higher difference in height more erosion will occur on that landscape.
Hydro Tool- The hydro tool is very similar to the regular erosion tool, however. Instead, it simulates erosion that is caused by rainfall instead.
Noise Tool- This tool is like the sculpt tool as it allows you to adjust the height of your landscape however it is used for more subtle variations in your landscape, and it is adjusted the height of your landscape based on the amount of noise.
Retop Tool– The Retop tool, or its full name is Retopologize tool, and this tool allows you to adjust the vertices on the x and y axis manually; the reason you might want to use this tool as it improves the vertex density in an area that might need it such as if you wanted to create a steep cliff this tool would be able to help with that also this tools causes textures to stretch less due to it spreading out the vertices into less dense areas.
Visibility Tool- This tool allows you to create holes in parts of your landscape, so if you wanted to create a cave in your landscape, this tool would be useful for that.
Mirror Tool- The mirror tools allow you to mirror an existing landscape or rotate it on the x and y-axis.
Select Tool- This allows you to select any area of your landscape.
Copy Tool- Allows you to copy any area of your landscape that you have selected.
How I used these tools in my Landscape
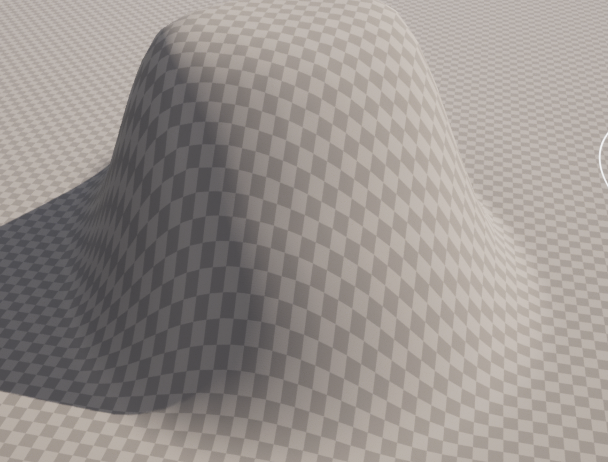
Now, I am going to look at how I used some of these tools when experimenting with my landscape; firstly, I used the sculpt tool around my landscape to create mountains and hills around my area as I wanted to create an area surrounded by mountains, so I create a variety of them and make sure that they are all different heights from each other.
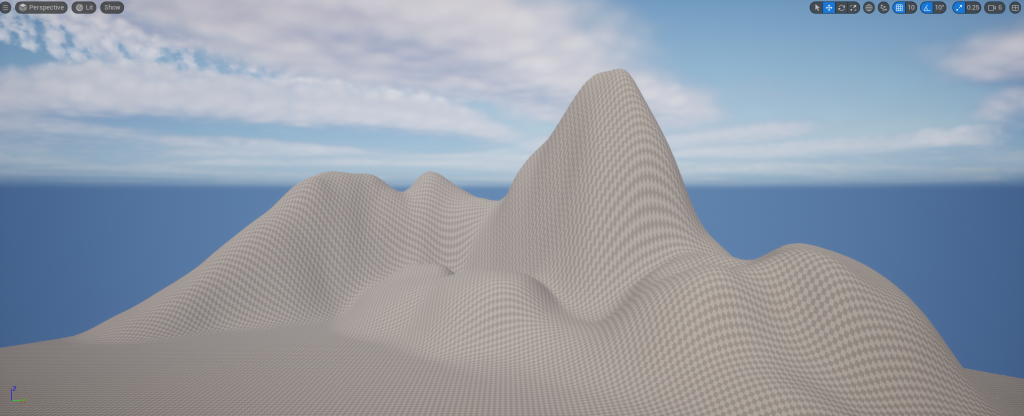
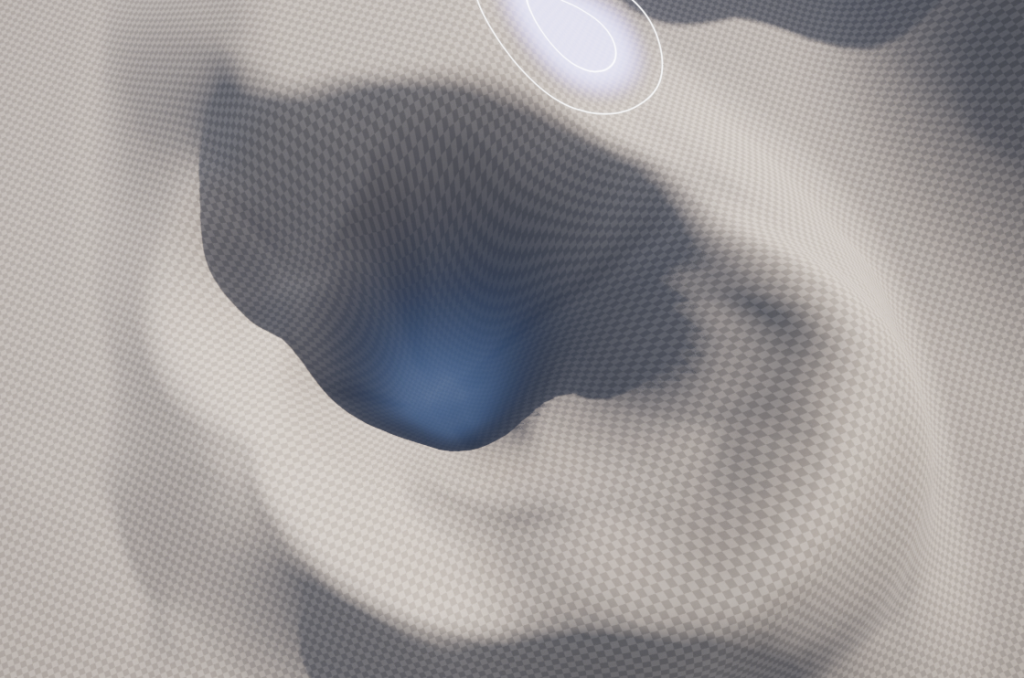
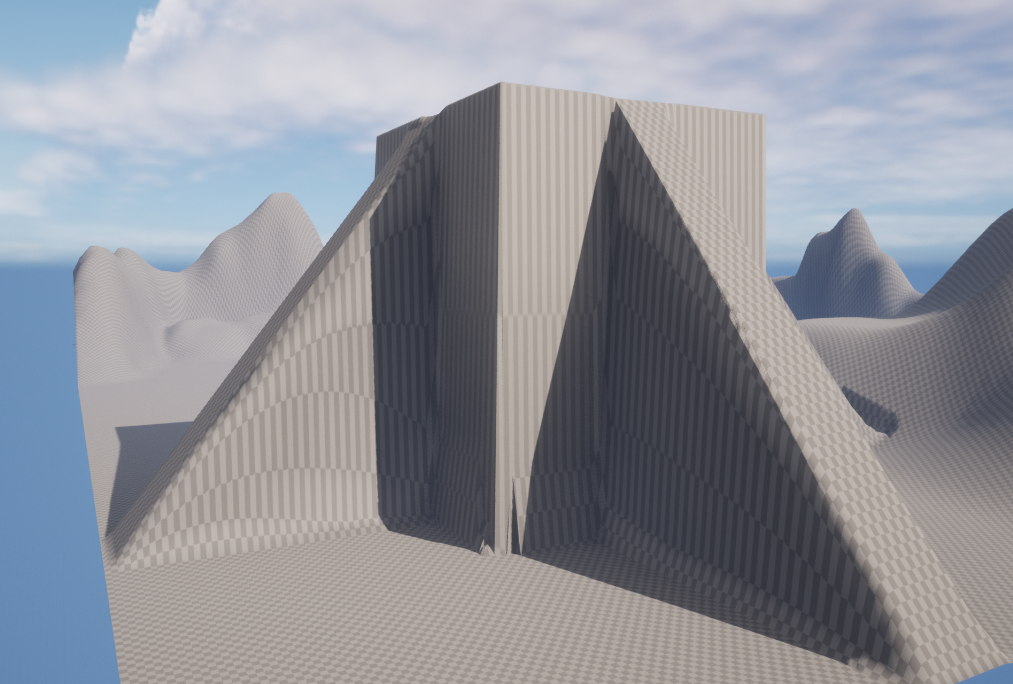
Also, I used the sculpt tool to create holes in the ground, as shown earlier and lastly, I used the ramp tool to create multiple ramps around one object in my landscape, as shown earlier.