3D Modelling A Shield
After making mock-ups of some shields, I decided that I wanted to create a 3d model for it as well and to do that, I decided to use Maya for this as I have some experience using that program. I felt making it in Maya would be the easiest way to go about it.
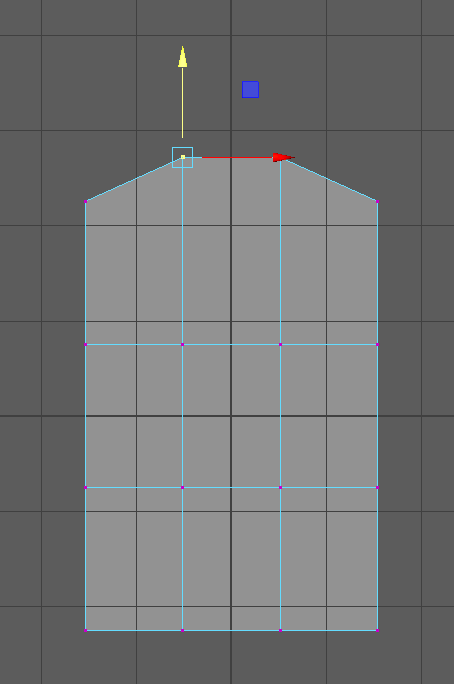
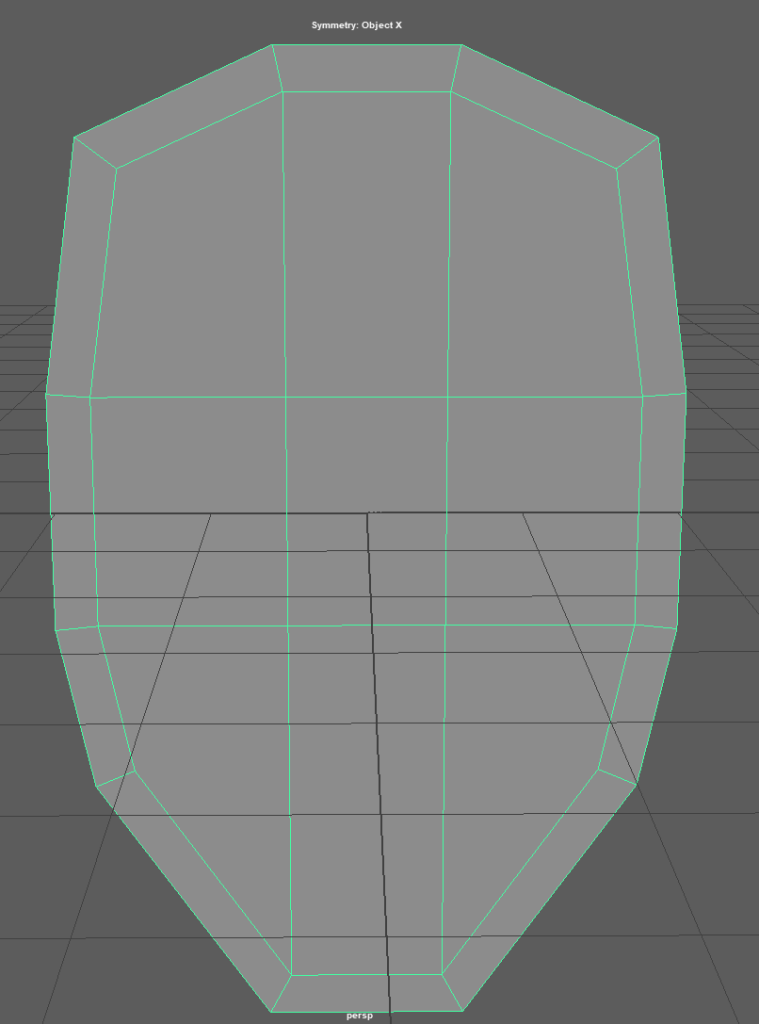
Firstly, I added a plane into the project, which would be used as the base to form the shape of the shield, so I rotated it by 90 degrees as, by default, it would be flat on the ground which wouldn’t work for my shield and then I adjusted the scale of it to make it a lot larger in size so now I just have a rectangle that I can work on to make the shape of the shield.
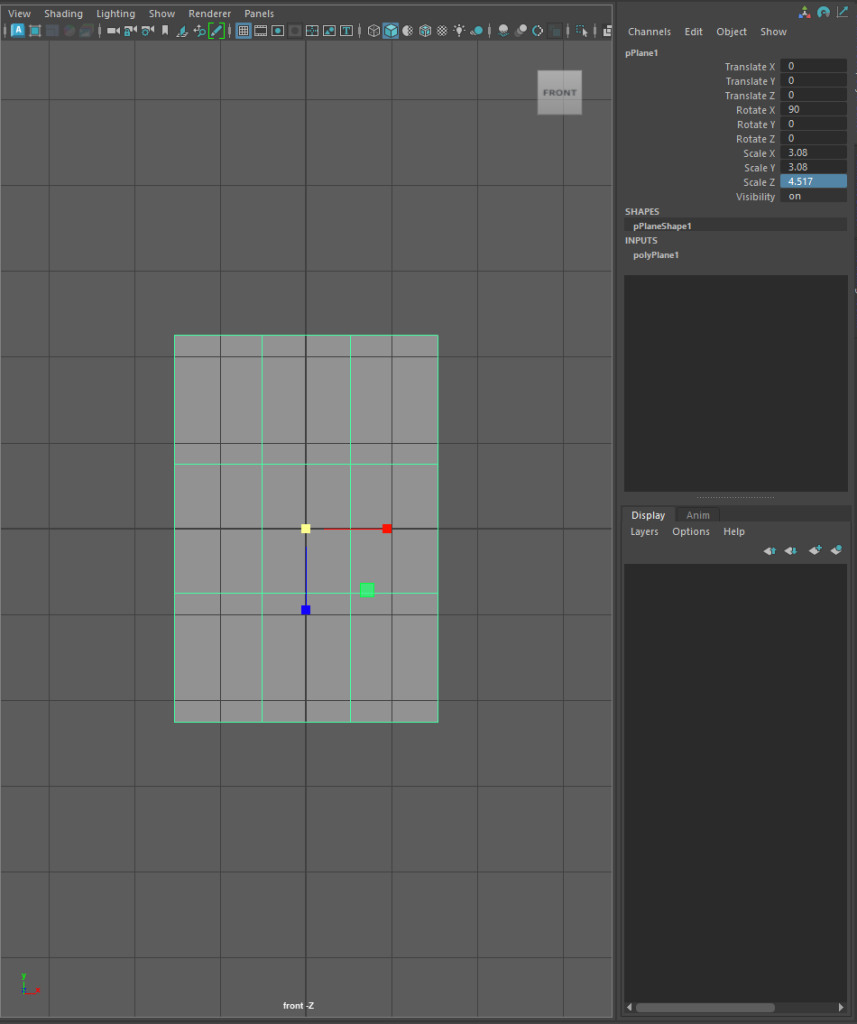
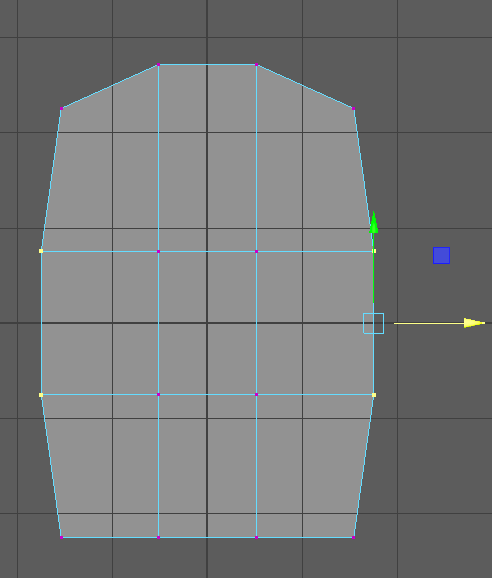
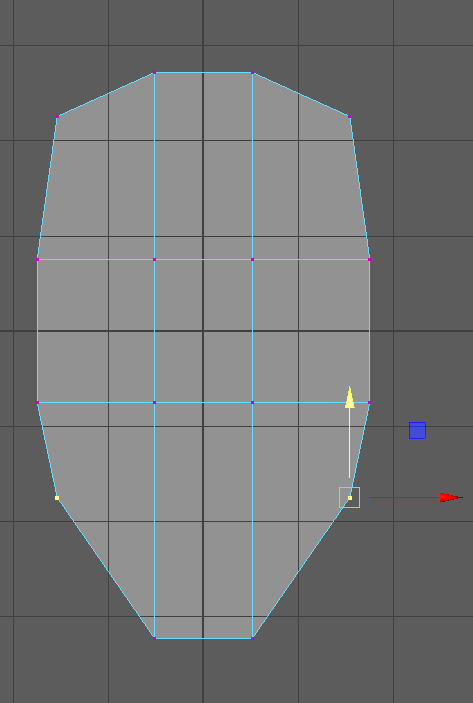
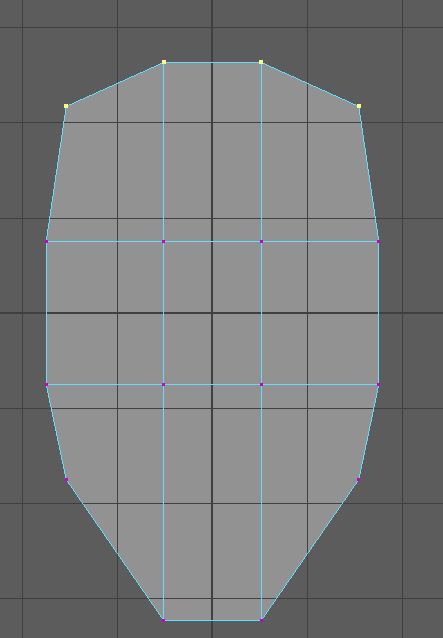
To adjust the shape of the rectangle, I put it into vertex mode as by doing this, I could adjust each vertices on the object so it can form into the shape that I want it to be, and I turned on symmetry so the changes would be affected on both sides and to move the vertices I needed to switch to the move tool while in this mode then at the first I moved the top vertices and continued this process until I got a base shape of the shield that I was happy with.

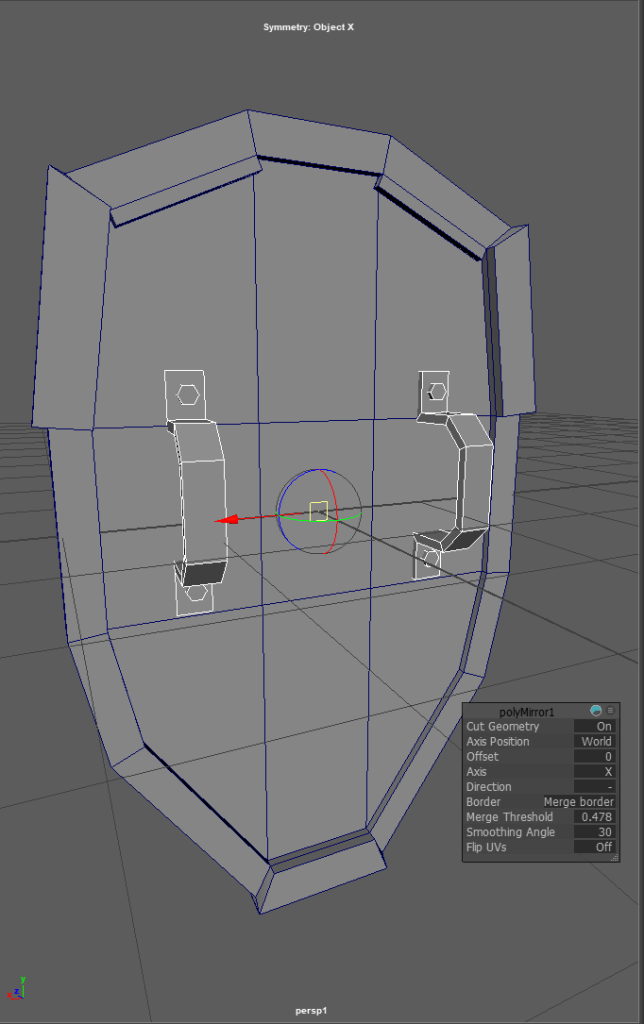
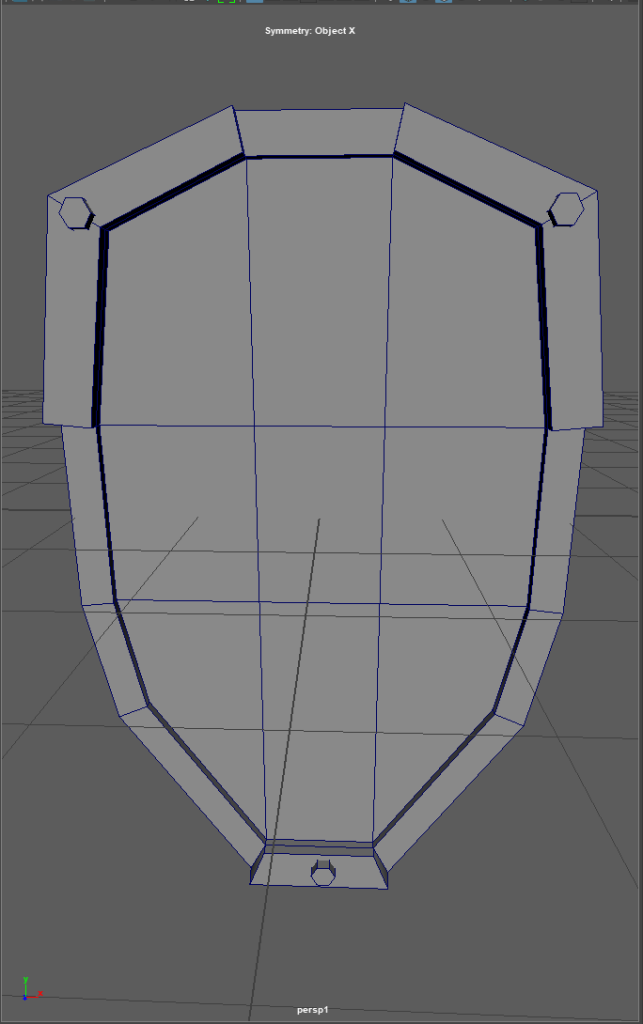
Making A Rim for the Shield
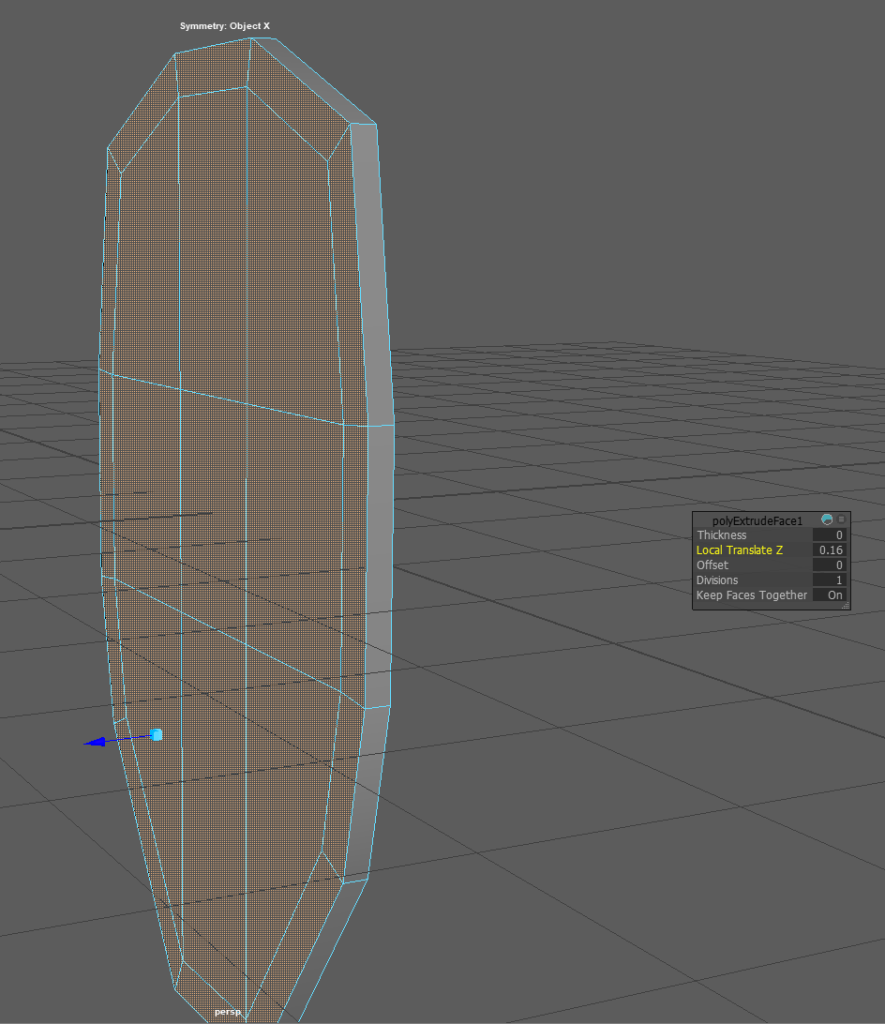
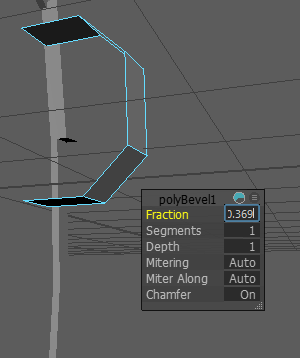
Now, I will switch to edge mode, which allows you to select the edges of your object so you can adjust them to your liking then I select all the edges of the shield then use the extrude tool to make the shape of the rim by giving it an offset of 0.278.
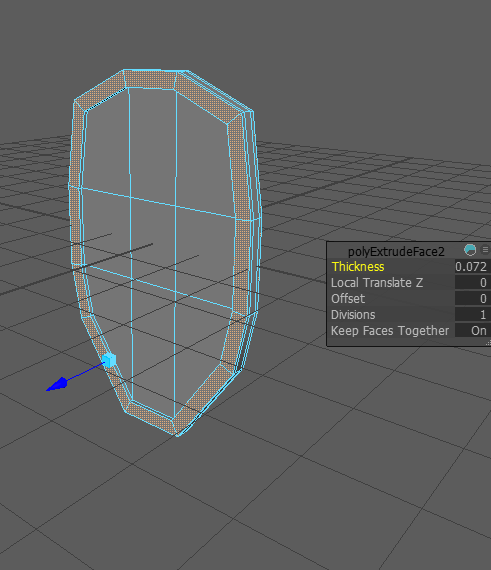
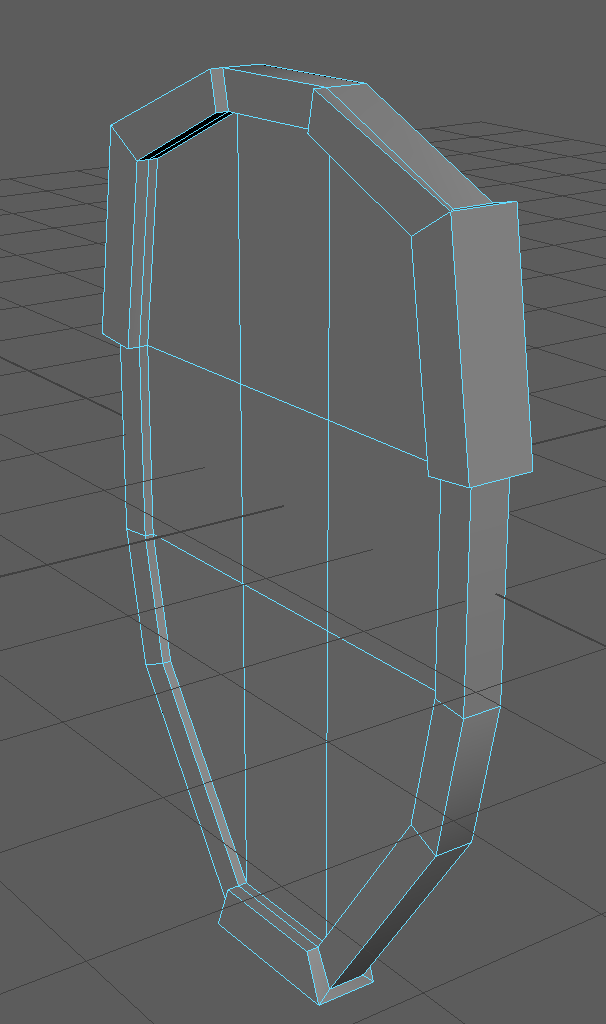
However, the whole shield looks very flat to fix that, I will just use the extrude tool again to increase the thickness of the shield, so it won’t be flat anymore. Lastly, for the rim, I decided that I want to extrude out some of the corners of the rim to add more detail to it and make it look a bit more unique.
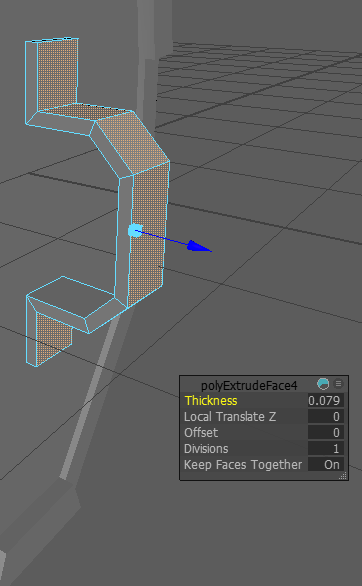
Making The Straps For The Shield
Firstly, for the straps, I added a cube to the project which could be used as the base to form the straps then I used the scale tool to make the size of the cube smaller, then from there, I just deleted the faces from the sides as I didn’t need them for the straps.
Next, I will go back into edge mode and select the top and bottom edges on the back of the strap and use the bevel tool to make it closer to the shape that I want the straps to be now I am going to select two edges that are right at the top of the strap and move them out so I can add a bold there to make it look like the strap has been bolted onto the shield.
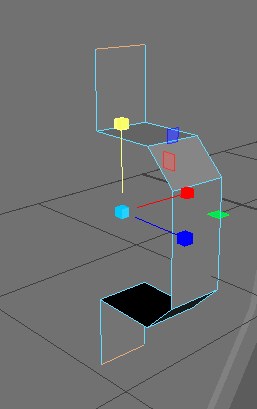
Lastly, for the strap, I increased the thickness of it so it’s not flat anymore then I just made a simple bolt as mentioned before, added it to the strap and some of the fronts of the shield then I just used the mirror tool to duplicate the strap so there is two of them on the back.