Experimenting With Materials On Landscapes (Week 2)
Adding Materials to My Landscape/Creating Materials
Currently, my landscape has no materials, so it looks very boring visually due to it having no materials/textures assigned to landscape so I am going to use some of the textures from the starter content to create materials that can be used in my landscape, such as grass, rocks etc.
So, the first I need to do is create a material to which we can apply textures from the starter content to do this in the content browser, you have to right-click, and then a new drop-down menu will appear with a lot of options; however, the one we are interested in is creating a material so just click on the material button and a blank material will appear in the content browser where you can name it and edit it.

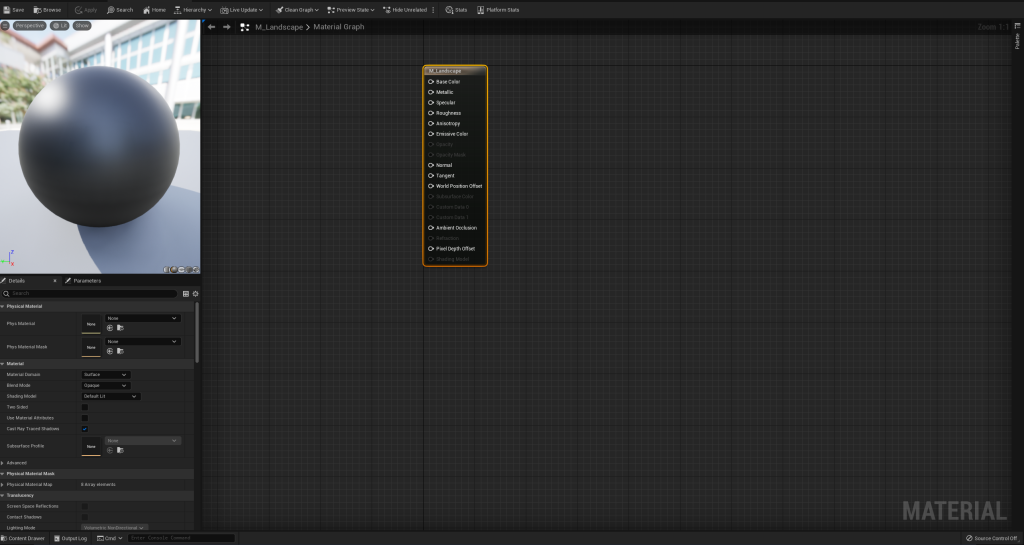
Material Editor
When you double-click on the material you have just created in the content browser, it will open the material editor, which allows you to edit the material to your liking as the name suggests, how it works in Unreal is that it works through nodes and each node on a material allows you to change a particular part of the material such as the basic colour of the material etc and by plugging stuff into those nodes it will affect the appearance of the material.
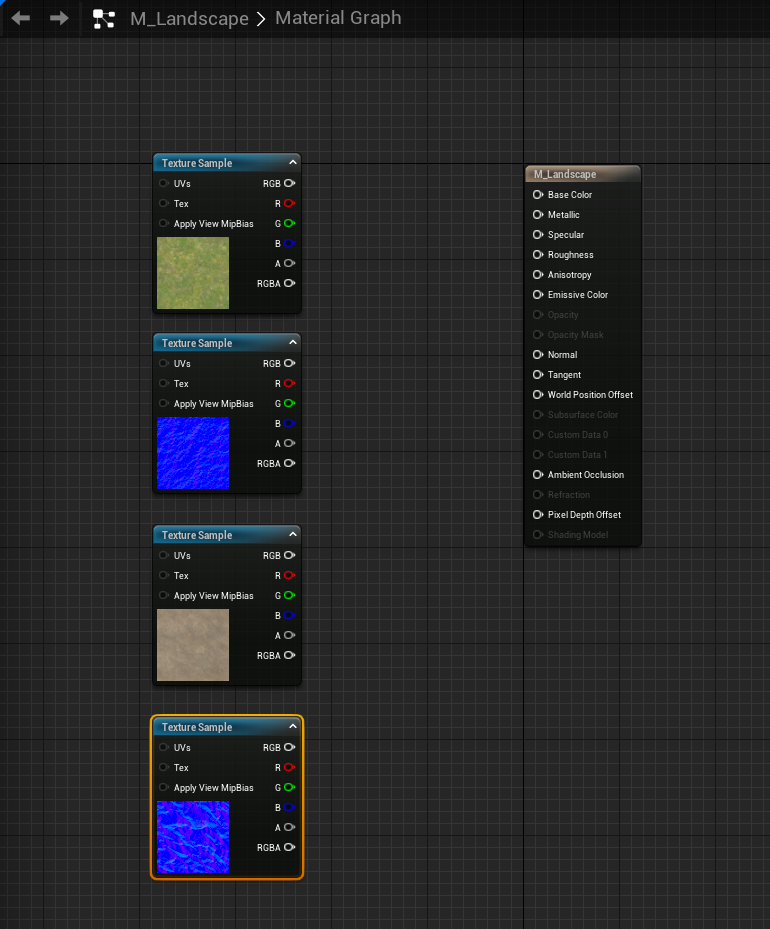
Now, I am going to need to import some textures that I want to use for the ground for my landscape, and the textures I am going to use from the starter content are the grass and gravel textures also, when importing textures into the material editor you should import the normal map for that texture as well as this affects how the lighting affects the look of the material and texture to make it look more 3D instead of flat 2D texture and to import them just simply drag them into the material editor.
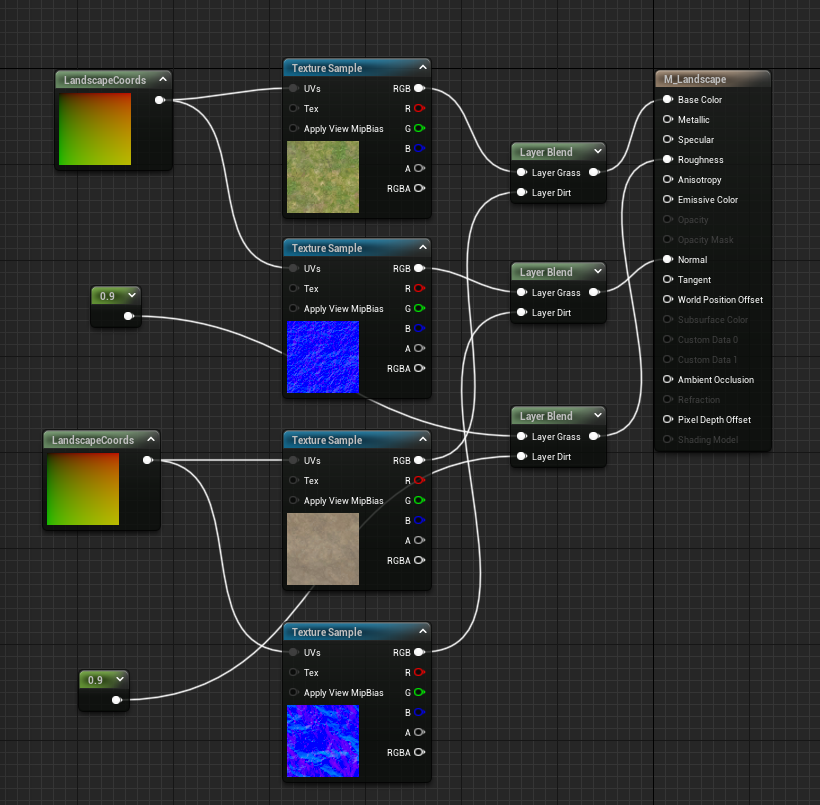
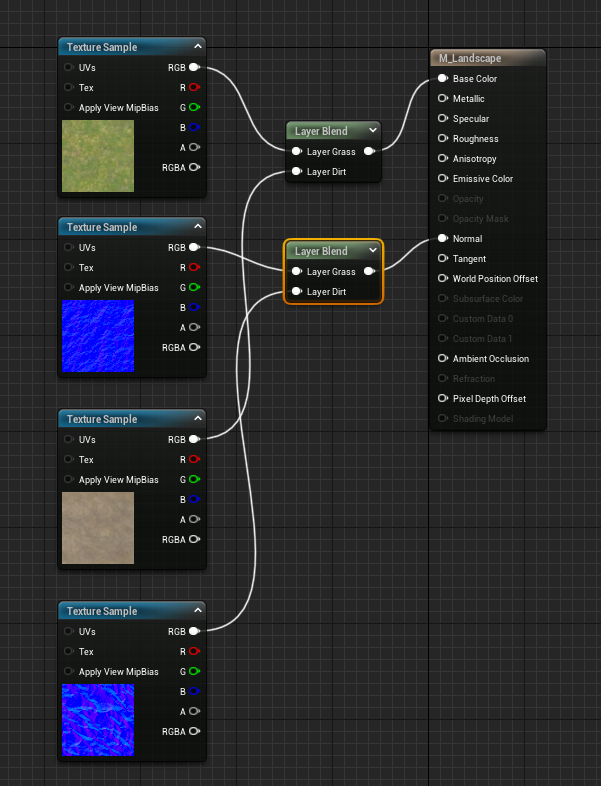
Layer Blend Node
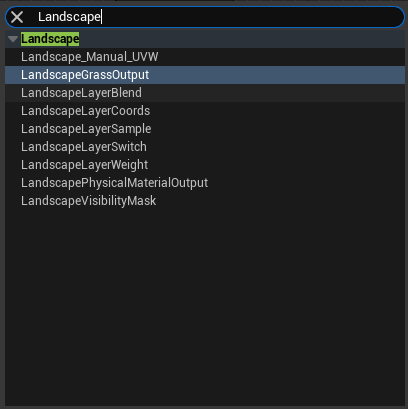
Instead of just plugging the textures directly into the nodes for the material and I am going to create a layer blend node, as this will allow me to paint onto my landscape and allow me to edit it more to my liking so I can get the appearance exactly how I want it to look and to do this right click anywhere in the material editor and new window will appear which you can search for any type of node in and in this case I can search landscape, and it will come up with layer blend node.
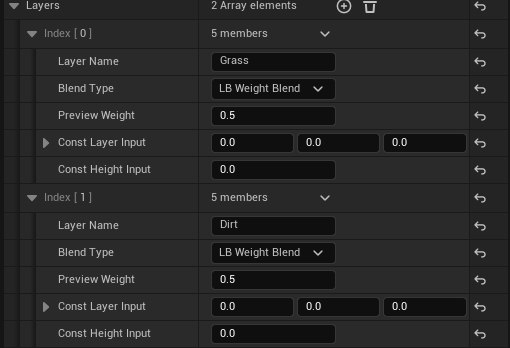
The layer blend node basically acts as layers for your material as it allows you to add multiple layers to your material it acts similarly to how layers work in Photoshop, and to add layers to your layer blend node, all you have to do is click on the layer blend node and on the left side of the UI you will notice a window that allows you to change stuff regarding the layer blend node and this where you will add your layers, and it can just be done by pressing the plus icon.
Now I am just going to plug the textures into the correct nodes as the textures for the grass, and the dirt will be the base colour of the texture. They will end up going into that node; however, I need to plug them into the layer that I have just created, and that can be done by dragging the RGB value from each into their layers and then plugging them into the base colour value on the material itself.
I have to repeat this process from the normal maps of these textures, so I am just going to copy and paste the layer blend node that I just created and then do the same as I just did, however, the only difference is that I will end up plugging them into the normal map node on the material itself.
Changing the Landscape Coords of The Material & The Roughness
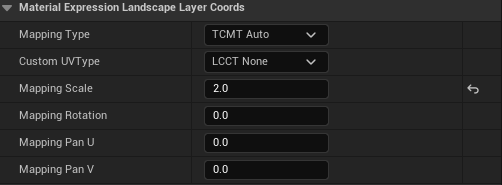
Now I am going to change the landscape coords and what this does is allow me to change the size of the material so the texture can stretch across more of the area in my landscape. To do this, I need to create a landscape coords node, which can be done by right-clicking in the material editor and searching for it.
And to do this, on the left side of the UI, when you click on the landscape coords node and window will appear with all of the values you can change relating to it the one I am going to change is the mapping scale which will increase the size of it, and I am going to set it to 2.
Lastly, I am going to set the roughness of the material to 0.9 as, at the moment, the material looks too shiny and naturally, the ground isn’t very shiny or reflective in nature to do this, I am going to add a constant node which just a node that allows you to put a number value into it then I am going to plug that into another layer blend node then plug that into the roughness value on the material itself.