Texturing My Model in Substance Painter and Exporting Textures For Use In Maya
Now, that I have imported and baked my model in Substance painter I can now begin to start applying the textures that I want to use for my Shuriken and in the Substance, there are a lot of premade materials that you can use for textures and I will be using these for my textures.
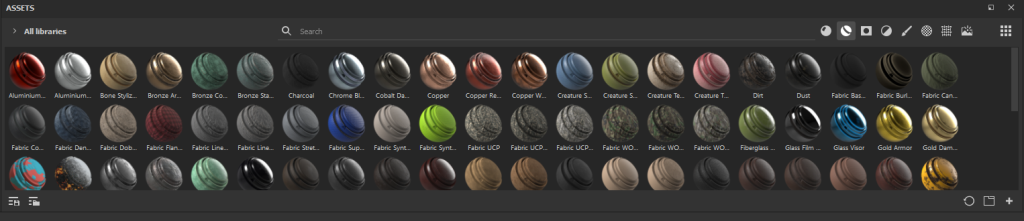
Also, there are different types of materials in Substance there are of course are regular materials and the type of material that I will be using are smart materials and the difference between these and regular materials is that these materials contain multiple layers instead of just one like a regular material would and when you drag a smart material into your scene you will see a folder icon next to it in the layer order window.
Also to be able to access smart materials all you need to do is click on the second icon in the assets section of the UI below you can see what this looks like and the smart materials that I chose to use were steel ruined and steel painted rough damaged and the reasons I went with this materials is that Shurikens are typically made out of steel and I wanted to use materials that shows signs of wear and tear and general damage on the Shuriken and these materials were a perfect fit for this.
However, when I add both of the textures that I want to use to the model it will apply both of them over the whole model and because of this one of the textures will appear on top of the other one and due to this you won’t be able to see the other texture so to fix this you have to go the layer order window and right-click on the material and select the create a black mask option and what this will do is allow you to paint on the areas where you want to that texture to appear on the model.


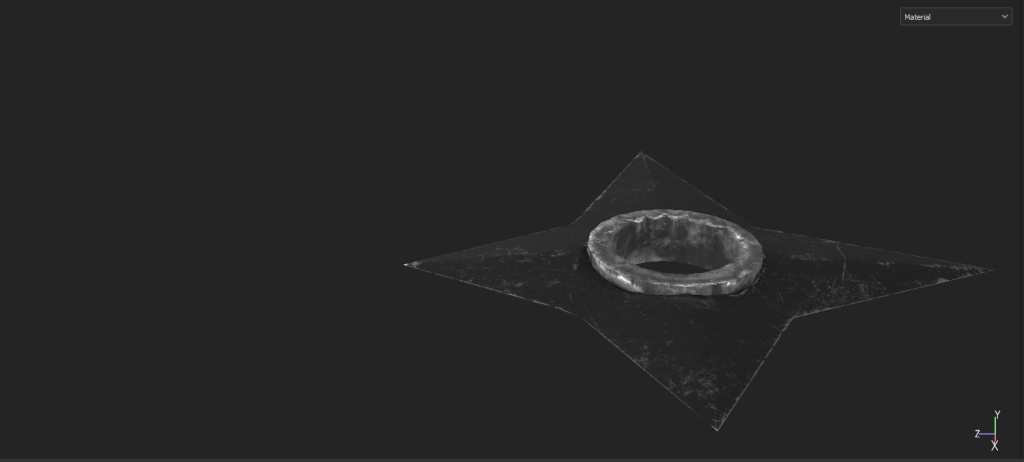
Now all I need to do is apply the textures to the areas that I want them to appear on my Shuriken model however I won’t be using the standard brush tool instead I will be using the polygon fill tool. Also, the reason I am using this tool instead is that it will allow me to be more accurate as I will be able to select the individual polygons that I want to apply the texture to by dragging and holding down the right mouse button while using this tool it will apply the texture to all the parts you have dragged it to so it much quicker than using the standard brush tool. Also to use this tool go to the left side of the UI where all of the tools are and under the brush tool there will be the option for the polygon fill tool and below is what the icon for this tool looks like and the final textured version of my model.

How to Export Textures From Substance Painter For use in Maya
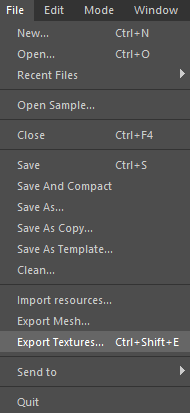
To export textures from Substance Painter so you can use them in Maya the first thing you need to do is go to the file option which is at the top of the UI and scroll down until you find the export textures and click on it.
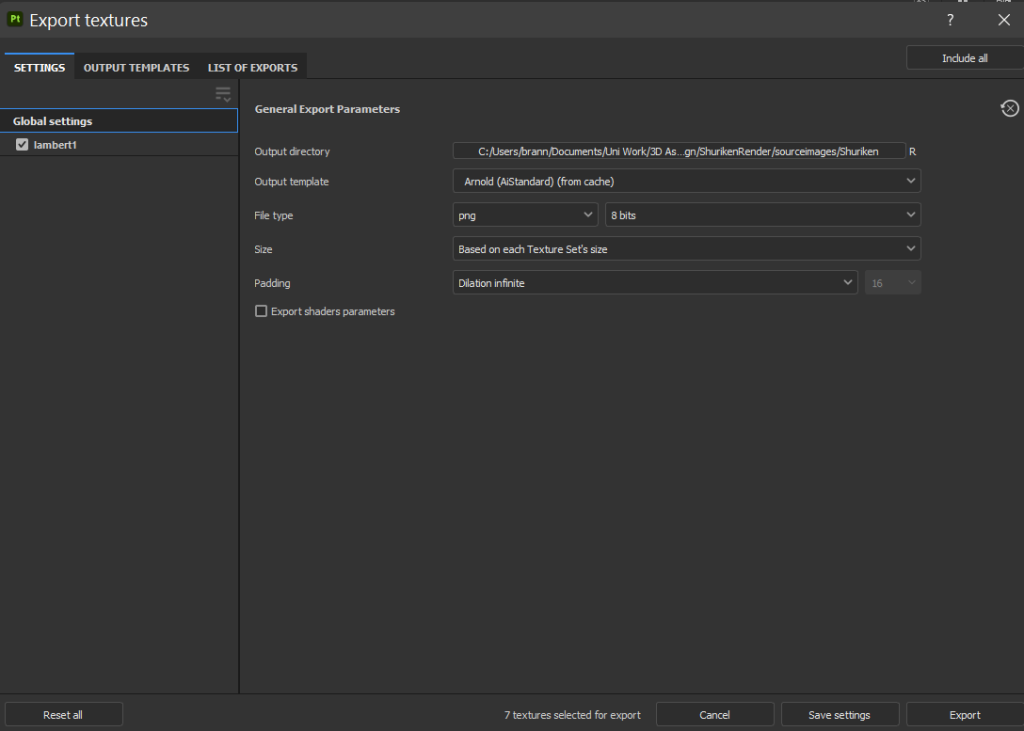
When you click this option it will open a new window which will allow you to change settings relating to the textures you are going to export such as the template you are going to use the output textures and the template are going to select for this Arnold AiStandard and where you want to save your textures and I will set it to the folder that I set up for this Maya project apart from those two I will keep the rest of the settings to their default option.
However, I can’t export my textures just yet because by default this template doesn’t include ambient occlusion and this is where in 3D models it is a shading and rending technique used for calculating how exposed each point in a scene is to ambient lighting. However, there is a way to add ambient occlusion to this template and to do that you select the output templates button which is at the top of this window and scroll down until you find the Arnold (AiStandard) template and click on it and it will open a new window which will look like this.
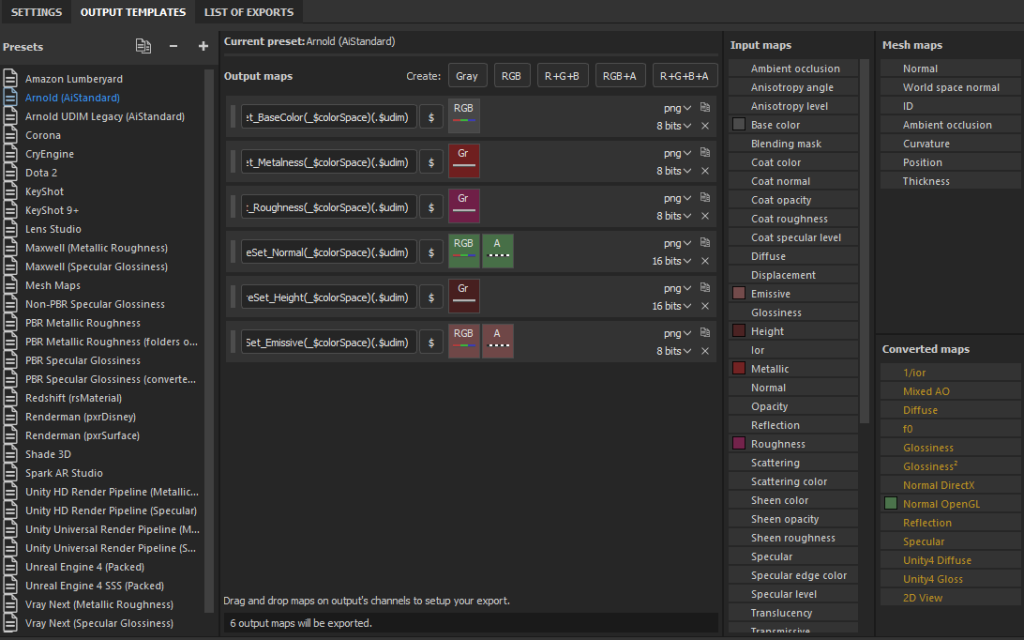
To add ambient occlusion to this template you need to create a grey output map which can be done by clicking on the button that says grey at the top of this window when this is added copy and paste the code from the first output map and where it says basic colour change it to say AO instead.
The last thing you need to do is go to the converted maps section in the window and by holding down the left mouse button drag the mixed ao option and drag it to the grey square that is in the output map that you created for ambient occlusion and a small window will appear saying if you want to put into the grey square and just say yes to add it and below is what this should look like.
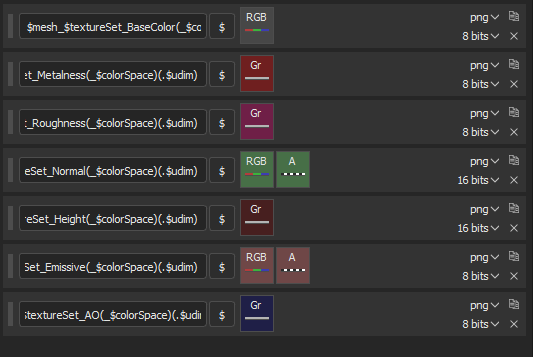
Now I can export my textures and to do this I just need to go back to the first window by clicking on the Settings button and click on the export button which is at the bottom of the window and now it will have exported all my textures and saved them to the location that I set and now I will be able to use them in Maya.