Exporting Models from Maya and Baking in Substance Painter
Now, I will be looking at how to export a model from Maya which will allow me to import it into Substance Painter and from there I will do the baking process which is where you bake all the information from the higher poly model into the low poly model that you have created.
And in my case, this will be shuriken models and the reason that you might want to do this is that it saves on system resources by having a low poly count and it will look as good as the high poly model does.
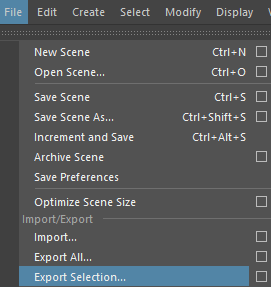
Now, with that out of the way, I will show you the process of exporting models from Maya, firstly you need to select the model you want to export in the outliner and then go to the file tab which is at the top of the UI then scroll down until I find the export selection option then select it.
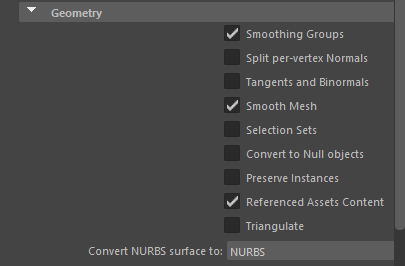
Next, a new window will open which will allow you to choose the file type you want to save the model as and in this case I will be saving my low and high poly models as a .fbx file as this is a file format supported by Substance Painter also in this window there some settings relating to how the model will be saved such will have a smooth mesh and many more options.
The options that I chose are in the geometry tab in this window and I selected the smoothing groups, smooth mesh and lastly the referenced assets content options what these options will do is export the smooth mesh applied to the model.
Importing into Substance Painter
When you import a model from Maya into Substance Painter, the first thing you need to do is create a new project then a new window will open with a lot of settings relating to the new project you are about to create such as being able to select the model you want to use.
And in my case, I will be using my low poly model and then other options that I selected which are the resolution to be set to 4K and lastly the compute tangent square per fragment option after you selected all of the options you want to use just press the ok button and the model will be loaded into substance painter.

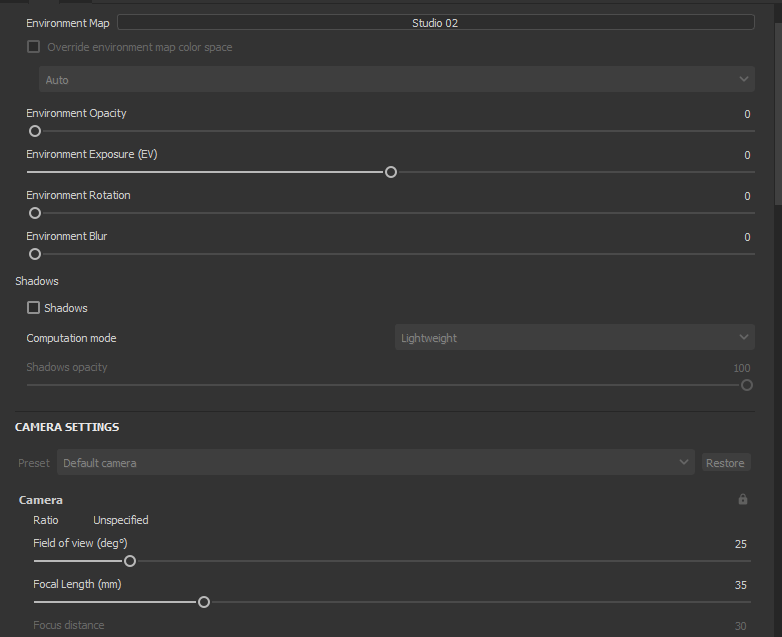
Now, that I have imported my model in substance before I begin the baking process I am going to change some of the display settings and the first thing I am going to change is the environment map which is the background that will appear behind my model in Substance Painter I selected the studio 2 and I set the environment opacity to zero so it will just be a blank background that will have lighting that will shine on the model.
The Baking Process
The first thing you do in the baking process is go to the texture set settings tab which can be found on the right side of the UI and scroll down in this tab until you find the mesh maps section of it, and you want to click on the bake mesh maps button and this will open a new window.

From here you will be able to change settings relating to the baking process such as selecting the high poly model that you want to use for the baking to do that scroll down until you find the high definition meshes section in this window and next to the large text box there will be a file icon and click on it to select the file location of the high poly model.

Also, if you scroll down further you will find a section which will contain the suffix for both of your low and high poly models the suffixes are the ones you used in the file name of your models and this is case sensitive so make sure if you use capital letters in your files input them into the suffix text boxes or it won’t be able to bake the model.
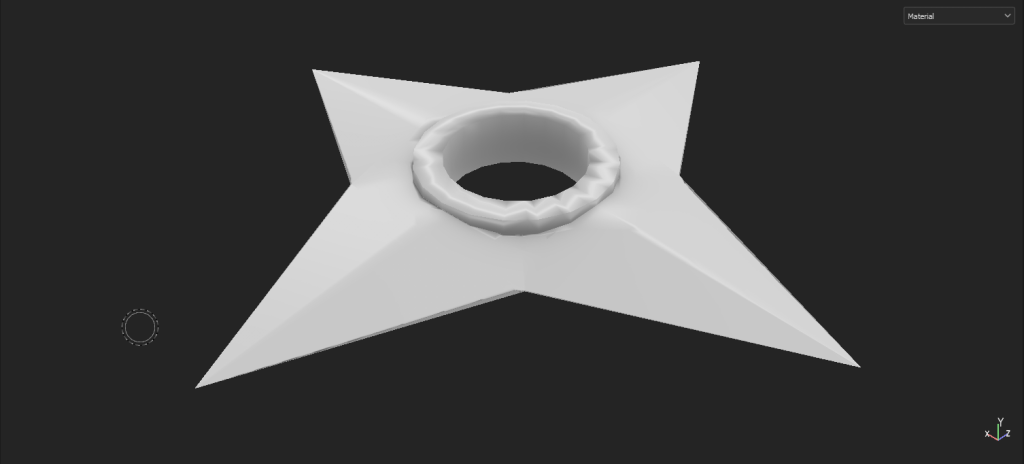
Now, the last thing you need to do in this window is scroll down right to the bottom of this window and select the bake selected textures button and it will bake all the information from the high poly model into the low poly model below you see what the baked model looks like.